This project was more of an educational exercise than anything else. In my day job there has been quite a buzz going around concerning the topic of block chain.
At its heart, block chain is a method that allows digital information to be created and distributed in a very secure manner over peer to peer (i.e. multiple computer) networks. The two key points being secure and being able to be sent over multiple transmission points has made block chain very attractive in recent years due to the increased use of cloud computing (where your data could be handled by multiple computers).
Where block chain first appeared was during the rise of crypto-currencies (the most familiar one of course would be Bitcoin) and it is still the core technology behind crypto-currencies today.
While crypto-currencies have matured to the point that they can be actively traded on exchanges like any "real world" currency, in the early days most people got their crypto-currencies by mining for them.
Mining is basically having a computer solve complex mathematical problems as part of the block chain process that creates new crypto-currency coins. The payoff here is that as a miner solves more of these complex math equations, the more coins they earn.
In the early days of crypto-currency, mining could be done with fairly simple equipment like an ordinary desktop PC. However, as crypto-currencies got more sophisticated, the equipment needed has evolved into dedicated systems that use Graphic Processor Units (GPU) to calculate the complex equations. These system can run into several thousands of dollars to purchase and operate.
Since I am more interested in the mechanics of mining versus making any real money, I just wanted to see what I could do with the cheapest miner that I could make.
I did happen to have a spare Raspberry Pi laying around, so I did some research on Google on what so of mining had been done with it.
The issue with using a Raspberry PI as a crypto-currency miner is that we are fairly limited in what kind of coins we can mine. Most coins that are being mined today require a lot of horsepower in order to be properly mined and a lot of the mining applications also require access to a PC's GPU to mine, neither of which are the strong suits of a Raspberry Pi.
But the good news is that there are a few coins that can be mined using a computer's CPU versus its GPU, so that makes the Raspberry Pi a little more attractive. Even better, setting up a computer to mine with its CPU is fairly easy.
For this project, I will set up a Raspberry Pi to mine Bytecoin (not Bitcoin) using the CPUminer application, but the Raspberry Pi could also be used to mine coins in a similar manner.
Setting up the Pi to Mine for Coin
First off, I want to give credit to Electromaker.io for the very excellent tutorial on this subject which provided a lot of the background information that I needed for this project.
First, start by loading the latest version of Rasbian Stretch Lite from raspberrypi.org
I downloaded the zip file from the site to my PC and then I loaded the image to an SD memory card using Etcher. I popped the SD card into the Raspberry Pi and powered it up.
The version of Rasbian I used doesn't have the GUI interface, but rather the command line interface. Once the Raspberry Pi boots, you need to log on using the default Pi id and password from the command line.
Once logged in you then need to set up the Pi to access the network and configure a few other things.
To do this, you would use the Configuration Tool which is accessed by entering this on the command line:
sudo raspi-config
You should see a screen like this
Start by selecting the Network Option, you would select the WiFi SSID sub menu option and enter the details for accessing your WiFi network.
Exit out of the Network Menu and select the Localization Options and update your keyboard to the generic US keyboard and set the time zone for your area.
Once that is all done, select Finish from the main menu and the Raspberry Pi should reboot.
Once the Pi has rebooted, log back on again.
At this point I always check to make sure that the Rasbian operating system is all up to date.
I do this by executing these commands at the command line:
sudo apt-get update
sudo apt-get upgrade
In order to prepare the Pi for installing the CPUminer application, we next need to load in some additional utilities. At the command line, enter:
sudo apt-get install autoconf libcurl4-openssl-dev libjansson-dev openssl libssl-dev gcc gawk
When this install is complete we are now ready to install the CPUminer software itself. To do that, enter the following command:
git clone https://github.com/lucasjones/cpuminer-multi.git
When that’s finished, we now need to compile CPUminer. This is done by entering the following commands:
cd cpuminer-multi
./autogen.sh
./configure
make
At this point you are ready to start mining.
For Bytecoin I decided to used the MinerGate pool for mining. There are a number of mining pools to choose from and I suggest you do some research on these pools to figure out which one you like the best. I had heard good and bad things about MinerGate. One thing that I do like about MinerGate though is that it is very easy to get up and running for a beginner miner. Registration is quite easy and that is what I'll use in this example.
After registering on MinerGate, enter the following command to start mining
./minerd -a cryptonight -o stratum+tcp://bcn.pool.minergate.com:45550 -u youremail@address.com -p x -t 4
With that you should start seeing some hashing activity on the Raspberry Pi screen
Adding a Pulse
I ultimately wanted to make this miner to be a set and forget application, meaning I didn't really want to keep logging into the Raspberry Pi to make sure that things were still working, but I also wanted to have some way to tell me that the Pi was still alive and kicking.
The easiest way that I can think of doing that was to have the Pi blink an LED every once in a while. The premise being that if the LED was blinking, the Pi was still operating.
To make this happen, the quickest way was to make a very small Python script.
First I rebooted the Pi and logged back in again, and then I had to install Python. To do that I ran this command at the command line:
sudo apt-get install python-rpi.gpio python3-rpi.gpio
With Python installed we can now create the Python script to make the LED blink
First I needed to make a bin directory under our pi home directory. This was done with this command:
mkdir bin
I then went into that directory with the cd bin command
We can create a new python file, to be called blink.py with this command:
sudo nano blink.py
The Python source code for flashing the LED is listed below:
import RPi.GPIO as GPIO
import time
LedPin = 11 # pin11
def setup():
GPIO.setmode(GPIO.BOARD) # Numbers GPIOs by physical location
GPIO.setup(LedPin, GPIO.OUT) # Set LedPin's mode is output
GPIO.output(LedPin, GPIO.HIGH) # Set LedPin high(+3.3V) to turn on led
def blink():
while True:
GPIO.output(LedPin, GPIO.HIGH) # led on
time.sleep(5)
GPIO.output(LedPin, GPIO.LOW) # led off
time.sleep(5)
if __name__ == '__main__': # Program start from here
setup()
blink()
Once this code is entered, Ctrl X will save the file.
The purpose of this code is to turn the LED on for 5 seconds, followed by 5 seconds of the LED turned off.
To run the code from the command prompt on the Raspberry Pi, you would just enter the following:
sudo python blink.py
Making Everything Automated
With all the various programs now installed and configured, we can now start mining. However it would require us to log into the pi and manually execute the scripts each time we wanted to go mining This can be a real pain if we need to do this every time there was power failure or if we needed to unplug the pi for some reason.
My preference is to have the pi start mining as soon as it powers up.
The first thing we need to do is to create a shell script in order to activate the miner software as a batch script
In our bin directory, we want to execute this command:
sudo nano miner
In the resulting edit window, add the following lines:
cd /home/pi/cpuminer-multi
./minerd -a cryptonight -o stratum+tcp://bcn.pool.minergate.com:45550 -u <your email address> -p x -t 4
Save the program with CRTL W
The next step is to make our script executable. To do this we need to run this command:
chmod u+x miner
With our miner and the blink LED scripts now ready to go, we just need tell the pi to execute them whenever it boots.
The easiest way to do this is to have the scripts run as scheduled tasks.
To add the scripts to the schedule, we need to edit crontab scheduler, which can be done with this command:
sudo crontab -e
At the bottom of the listing, add the following 2 lines:
@reboot sudo /home/pi/bin/miner
@reboot sudo python /home/pi/bin/blink.py
These 2 lines will tell the Pi to execute the miner and blink scripts whenever the Pi boots up. Save the changes.
At this point, the coding part of the miner is complete and ready to go.
Building the Mining Shack
With the software of the Pi now sorted out, I wanted to pay a little bit of attention to the appearance of the miner.
During my testing of the mining software, I noticed that the Raspberry Pi was starting to get quite warm. Normally I would look to adding a heat sink to the Pi's CPU, but I happened to have a couple of old CPU fans sitting around and I found out that hooking one of those fans up to the 5V GPIO pins on the Pi provided excellent airflow for cooling,
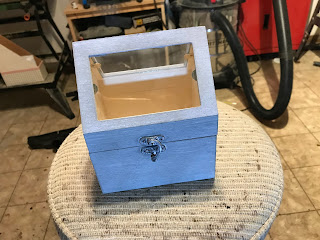
With the cooling situation solved, the next item was to determine the best way to house my mining operation. For this I wanted to have something that would make the miner a bit inconspicuous but yet be able to provide a visual status that the Pi was working OK.
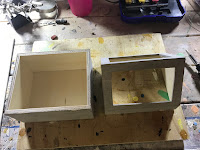
The other day I was in my local dollar store and I came across a bunch of small wooden terrariums that were intended for use in craft projects. The size of the box, along with the glassed in roof was ideal for what I wanted to do.
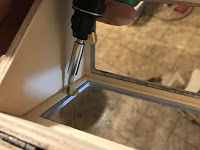
Once I got the terrarium home, the first order of business was to remove the hardware and glass from the box, which was done by removing a few screws.
With all the components apart, we can now start modifications.
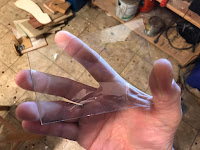
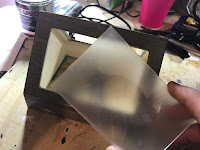
I started with the glass panels. These were clear glass panels, but I wanted to add an air of mystery to the box so I didn't really want to have the insides of the box being visible but at the same time I also wanted to have the light from the LED visible.
The solution was to paint the glass panels with frosted glass paint (this type of paint is typically used to frost bathroom windows) which can picked up at any hardware store.
While the paint was drying, I then focused on building a mount for the Raspberry Pi within the box of the terrarium.
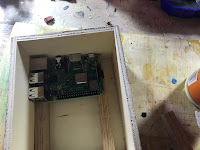
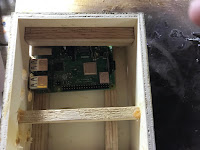
Since the Pi will be generating some heat while it's mining, I wanted to mount the Pi so that it was off the bottom of the box a little bit in order to provide some air flow. To accomplish this, I decided to install a couple of 1/2 inch square birch strips on the bottom of the box for the Pi to be mounted on.
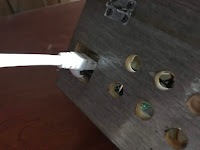
The position of where the strips were placed needed to be dictated on where the power and Ethernet ports of the Raspberry Pi where located.
The idea was to have the power and Ethernet ports be directly accessible through the outside wall of the box. So based on that criteria, the Pi needed to be mounted on the left hand side of the box, with the Ethernet port flush against the back of the box.
I cut to length and glued the first strip against the left hand side of the box. Next, using the Pi as a template, I then glued the second strip into position.
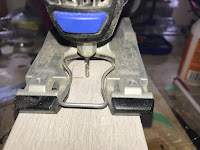
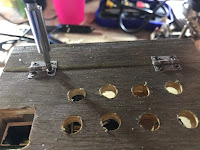
Once the access holes for the Pi were made, I then made a series of ventilation holes along the back of the box to allow for airflow for cooling the Pi. I marked the spots an inch apart along the back of the box and then drilled a series of 3/8 inch holes at each marked spot.
With all the surgery now done, I gave the box and lid of the terrarium a couple of coats of varnish.
With the mount for the Raspberry Pi in place, I now needed to make a mount for the CPU fan.
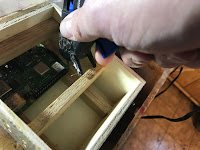
First I glued a 1/2 inch birch strip to the left side of the box about a half inch from the top. Then, using the Pi and the fan as templates, I determined the best position for the second birch strip to be installed. When making that determination, I had to make sure that the strip was situated such that the fan would be positioned over the Pi to provide optimal air flow. Once that was determined, I then glued in the second strip.
Now we can permanently install the Pi into the box. Since there may be a time in the future where I may want to remove the Pi, the word "permanent" will be a bit of a loose term here. I want to be able to easily remove the Pi if I need too, but I do want the Pi to be reasonably secured to the mounts as well. To solve this issue, I attached the Pi with a small dab of hot glue on the corners.
The next step was to wire up the LED and fan so that they can be plugged into the Raspberry Pi's GPIO sockets.
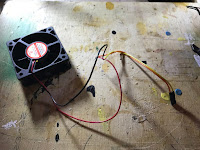
To be able to plug into the Pi, we need to attach the fan and LED to DuPont female connectors.
The DuPont connectors are actually pretty easy to find, I usually get mine from junked Desktop PC's (they are often used to plug in switches and status LED's into the motherboard) but they can be ordered from eBay for very little money.
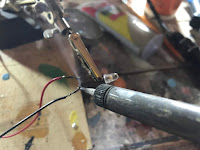
With a soldering iron, I just spliced the connectors to the fan and LED.
I then inserted the LED into one of the screw holes of the fan - which will serve as a mount for the LED.
Next we need to connect the fan and LED to the Pi. The fan will be connected to the 5V and Ground pin (indicated with red dots in the diagram below) and the LED needs to be connected to a Ground pin and the GPIO 17 pin (marked in yellow below).
Plug the wires into the appropriate GPIO pin on the Pi and attach the fan and LED to the mount above the Pi with some hot glue.
At this point the only thing left to do is to reassemble the terrarium by reinstalling the glass and hinges.
The project is now pretty much complete.
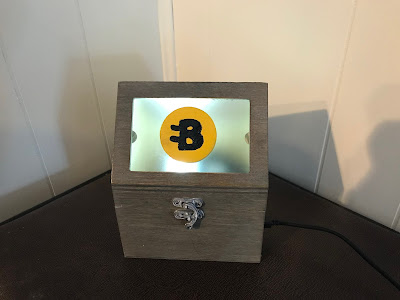
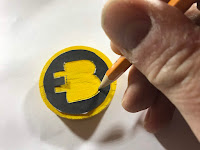
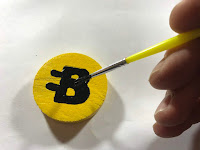
As a final touch, I did want to provide some sort of indication of what it was that I was mining. To do that I took a small piece of wooden dowel and painted the Bytecoin symbol on it.
The dowel was then attached to the front glass of the terrarium with a bit of hot glue.
The only thing left to do now was plug in the power, plug in the Ethernet cable and the miner should boot right up.
The miner should start blinking the LED every five seconds and you should also start seeing some mining activity on your MinerGate account.
I've been mining away for a little while now. Granted I won't be getting rich any time soon - but I have found it to be a very good introduction to crypto-currencies and it is kind of fun seeing "money" seemingly coming out of thin air.




















No comments:
Post a Comment