Sunday, October 28, 2018
Junkyard Entertainment Unit - Part 2
In a previous post I discussed the rescue of an entertainment unit from a junked minivan. Once I got the unit home and determined that it seemed to function fine, the next step was to get the unit into a form that would make it easier to view videos in a more traditional home setting.
The main issue was in the way that the DVD player and the screen were installed in the minivan. Since the entertainment unit was installed in the roof of the minivan, the screen and player were upside down in the traditional home viewing sense where you would have your screen sitting on top of a table, not hanging down from the ceiling.
In order to make things "right side up" and to have things ready for a new cabinet, I needed to remove the player and screen components from their original containers.
To start the removal, I flipped the unit over in order to see the underside.
Sunday, October 21, 2018
Installing an USB Charger Wall Outlet
These days there are more and more gadgets that draw their power through a 5 Volt USB connection.
It has almost gotten to a point where one has more devices that need to plug into a USB outlet than the old traditional 120 Volt outlet that's in your typical household wall outlet.
Around our house, it's always been a bit of a struggle to find a spare USB charger to plug into to the wall anytime I needed to charge any of my electronic devices.
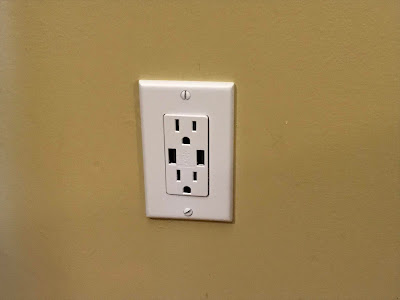
The other day, during my weekly pilgrimage to the hardware store, I came across one of these 120 volt wall outlets that had USB outlets built into them, Reading the box for the outlet indicated that the outlet was a rapid charge USB suited for many types of smartphones and tablets.
Another nice aspect of the design of the outlet was that I could use the USB and the 120 volt outlets at the same time, which eliminates the need of the wall wart USB charger that I had been using.
Intrigued, I bought one, along with a matching wall plate.
Sunday, October 14, 2018
The Junkyard Entertainment System
As I mentioned earlier, I like to sometimes take a bit of a tour of my local auto salvage yard just to see what is new and interesting,
Often during those trips I will see something that make me stop for a moment and think "I could do something interesting with that..."
On my last trip to the yard, I noticed a number of vehicles (mostly minivans) that had these DVD players and screens built into them. These systems were meant to entertain back seat passengers during those long road trips.
Being intrigued by this, I researched a little bit about them, focusing on the various makes and models of vehicles that I found in the yard that had one of those systems installed.
The main problem that I had found with a lot of those systems was that they were electronically connected to the main stereo unit installed in the front dashboard of the vehicle. In essence this meant that the DVD player and screen, even though they were physically separate from the car's audio system, wouldn't be able to work without being able to talk to the main stereo unit,
In order to do what I wanted to do, I really wanted the DVD and screen to act as a stand alone device.
So, grabbing my bag of tools - I headed back to the junkyard and identified a suitable donor for my DVD player
Labels:
automobile,
automotive,
car,
DVD Player,
junk,
junkyard,
LCD,
LCD screen,
recycle,
recycling,
remake,
screen,
Small workshop
Sunday, October 7, 2018
Project - Cow and Bull Garden Ornament
This project is a really good way to put scrap lumber to good use!
This was a design that was original to one of my Great-Uncle's, who had passed away many years ago.
I was quite fortunate to have "inherited" a few of his designs and I consider sharing them as a good way to continue his legacy.
I have given away a number of these as gifts over the years and I have also sold a few from the "herd" that is currently occupying my front lawn.
Very easy to make, you can whip up your own herd over a weekend.
All the details can be found here.
Subscribe to:
Posts (Atom)


