Sunday, February 24, 2019
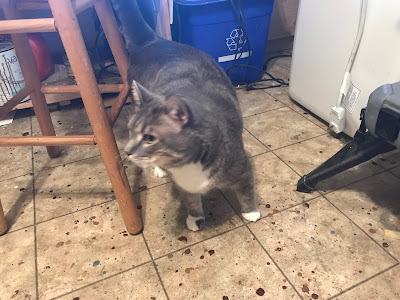
The Shop Supervisor
Most of the time I consider the time in the shop to be my "me" time.
Time to my self, away from the hassles of the day, to dream and create anything that pops into my head.
On a really tough day, the thought that I will be able to have some of that precious shop time later that night always keeps me going.
For the vast majority of the time, I am alone, tinkering away on my vision. But every once in a while I do get my puttering interrupted by a bit of verbal feedback concerning the progress of my projects from the shop floor.
The shop supervisor has arrived.
Now I usually can just appease him with some well-placed scratches under the chin, and maybe a few cat treats and then he goes on his way, but sometimes he really wants to closely inspect the work in progress to ensure that I'm not up to no good.
That's where it can get a bit tricky. There have been a few occasions where a paw has accidentally stepped into an open paint can, which sometimes requires a bit of a chase around the house in order to get him cleaned up - at least one good thing it's easy to find him since I just need to follow the trail of paw prints through the house.
Thankfully this is a fairly rare occasion, most of the time the supervisor is there to provide a welcome break and to give a friendly hello.
Then, of course, there's the yard supervisor.
Sunday, February 17, 2019
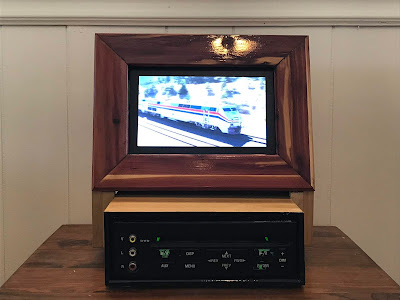
Putting the Junkyard Entertainment Unit Together
The last time we visited the junkyard entertainment unit, I had just finished building a cabinet to house the LCD screen.
Now that we have the 2 major pieces of the unit safely housed in their custom made cabinets, the final step is to now merge the two into one.
Due to the amount of work that were done in my previous posts, this will be actually a very straight forward process. At it's core, we just need to plug in the wiring harness from the screen into the DVD player, apply a bit of wood glue to the bottom of the screen cabinet and attach it to the top of the DVD player.
When attaching the screen cabinet I made sure to have the screen cabinet attached in the center of the DVD player while covering up the wiring harness going into the DVD player
Sunday, February 10, 2019
In Memory of a Friend - A Simple Clock Repair
A few months ago a very good friend of mine passed away from brain cancer. It was a very aggressive form of the disease and he passed away only a few weeks after his diagnosis.
It was a very tragic time for all of us that knew him, and it struck very close to home for me personally.
Shortly after the funeral, my friend's wife mentioned that she had "something" that she would like for me have to tinker with. When I finally came over to see what she had for me, I was presented with a fairly simple clock made from a slab of wood, minus its movement and its hands.
To the casual observer, it wouldn't have seem like much, but it is the story attached to this clock that makes it valuable.
The clock was made by my friend's grandfather as a present to him. I distinctly remember the stories my friend had told me about his grandfather and how proud he was of him.
Sunday, February 3, 2019
Project - Flickering Solar Garden Light
This particular project got a mention on the Show and Tell page in the Volume 66 issue of Make Magazine. So of course, I'm thrilled that these little experiments that I build in my shop are actually considered worthy by people that I consider much more talented in the art of making stuff.
The main spark for this project was a chance discovery at a local ham-fest. One of the vendors there had a very large assortment of LED's for sale. Looking a bit closer, I immediately noticed that he had some LED's on display that mimic the flickering of a candle.
Seeing the possibility, I bought a pack of 10 of the LED's and went back home to the shop,
After some tinkering, I came up with a very neat solar garden light that I build from some scrap wood and a very simple solar charging circuit in order to keep the LED glowing.
All the details on how you can build one can be found here.
Subscribe to:
Posts (Atom)


