Sunday, March 29, 2020
This Isn't Our First Rodeo Folks.
Needless to say, we are living in interesting times.
The world seems to be in a great deal of turmoil these days trying to deal with the virus is anywhere and everywhere. There is a lot of fear out there and it seems like the world has shut down and people are hunkering down.
On the whole, I do need to take a moment and at least appreciate what I do have. I am thankful that I have a job that allows me to be virtually anywhere - especially in my home - and still be able to work and interact with my colleagues (albeit via a webcam).
At the time I write this, I am and my immediate family are still healthy. While we are not under a quarantine order, we have greatly curtailed our activities dealing with the outside world and staying at home as much as possible. Thankfully this also means that I'm not locked away from the shop - which has proven to be a Godsend for me since it allows me an escape from the constant bad news out there.
Yes, in light of everything that is going on, there is much to be thankful for.
Sunday, March 22, 2020
Building an Aquarium Stand - Step 3: Building the Body
In my last post, I had just completed building the top of the aquarium stand.
One of the key items that I needed to figure out for the stand was the overall dimensions of the aquarium that I would be using, the reason for that is that it dictated the overall dimensions for the top of the aquarium stand, which in turn determined the size of the body and base of the stand.
So with the top sorted out, I started working my way down, making next item on the agenda building the body of the aquarium stand,
The design of the stand was that the body of it was going to be basically a large box with some internal storage in order to allow for stashing fish food and other supplies. The box will also need to be built heavily enough to support the weight of the aquarium when it's full of water (which could weigh over 100 pounds).
Sunday, March 15, 2020
Building an Aquarium Stand - Step 2: Building the Top
In my last post, I sketched out a bit of a design for an aquarium stand that I wanted to hold a tank to house George, our tame Sunfish.
With my plan of attack determined, it was finally time to head into the shop and start building.
As I previously mentioned, I designed the aquarium stand to be constructed in three distinct parts (top, body, and bottom).
Since the stand will be custom-built for the aquarium, the first logical step would be to start from the top.
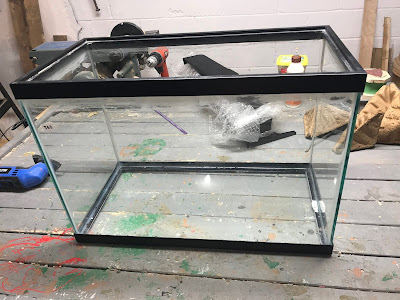
The first step in the process was to find out the footprint of the tank.
Labels:
aquarium stand,
Clamp,
How To,
pine,
plywood,
router,
table saw,
veneer tape,
wood,
wooden,
woodworking
Sunday, March 8, 2020
Building an Aquarium Stand - Step 1: Determining a Design
For several years, I've always enjoyed doing a little fishing during the warmer months.
I find fishing to be almost a zen-like experience.
Sitting quietly in a boat, watching the water ripple around me, focussing my senses on a thin monofilament line, trying to sense a bite. I often find the experience quite relaxing and even if I don't catch anything, I always come home rejuvenated.
While what I may call relaxing, others in my house would call it boring, so my fishing experiences have more or less been done solo. So it was much to my surprise that my son wanted to try his hand at a fishing derby that I usually take part in during the fall.
I was even more surprised when he actually enjoyed it enough that he wanted to do a couple more fishing excursions before the snow started to fall.
Typically we fish for Smallmouth Bass or Perch, so when during our last trip of the season my son caught a rather small Sunfish, I was fully expecting him to let the little guy go and keep fishing for bigger quarry.
Instead, he slipped the fish into the minnow bucket and we ended up taking him home with us.
Labels:
aquarium stand,
diy,
How To,
pine,
plywood,
wooden,
woodworking,
workshop
Sunday, March 1, 2020
Web Visitor Counter Revisited - Building a Case for the Counter
A few months back I published a series of posts around the construction of an electronic counter that would provide me with a constant display of the web traffic to this website.
The counter has been working away for a number of months now with no issues or complaints, well maybe one complaint,,,
While the counter does work beautifully, it is also just a lump of wires and electronic components that's been sitting on my desk in an unsightly mass. Additionally, the wires have recently become an attractive plaything for some of the furrier members of the household.
Obviously, if I wished to have my new toy to continue to function, I needed to do something.
In my last post, I did some experimenting with the Cricut Maker, a new tool that we recently got. One of the reasons that I was intrigued by the Maker was that it was capable of making very accurate cuts in thin sheets of plywood.
After some initial experiments with the Maker, I was ready to try my first project - a proper enclosure for my web counter.
Subscribe to:
Posts (Atom)


