Sunday, March 31, 2019

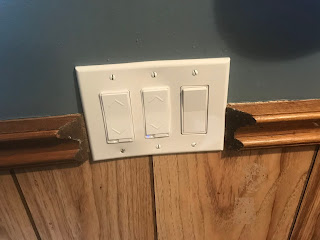
Installing a Wi-Fi Enabled Dimmer Switch

Harnessing the power of the internet - to turn on your lights

A little while ago I gave a wall outlet in my house a bit of an upgrade by replacing it with an outlet that also doubled as a USB charging device.

I was actually pretty intrigued about the idea of adding additional little enhancements like that to my home. One thing that has always been a bit of a sore point in my household is that sometimes we go out for an evening, usually when it's still daylight out, only to come home to a dark house because we forgot to turn an outside light before we left.

I live in a rural area, so it gets pretty dark out and it can be quite the struggle to unlock the front door in the dark.

I had heard of new light switches on the market that could be connected to your smartphone via your home Wi-Fi and internet connection. Drawing on my fresh experience with the wall outlet, I thought I would take a quick look at them during my next foray to the hardware store.

Now my initial thought that the label "Smart" was just a code word for "expensive", but to my surprise, I found a pair of smart dimmer switches for about 20 dollars.

So, they came home with me.

Sunday, March 24, 2019

Thrift Store Recon

Bargains as far as the eye can see


True to form, I am always on a never-ending quest for finding things that a lot of folks would otherwise consider "trash" with the intent of giving them new life in a new form.

As opposed to roaming the local junkyard or raiding the e-waste for raw materials for my projects, I sometimes go upmarket and occasionally check out the local thrift store.

The nice thing about thrift stores is that they are typically run by a charity where all the profits from the store usually go to helping others in my community. Because the proceeds are for a good cause, people typically donate items that still have a great deal of life left in them.

The fact that the items for sale in the store are dirt cheap is always a very nice bonus!

So I usually find my local thrift store a source of good cheap parts for my project ideas.

But I also get a great deal of entertainment in perusing the aisles. I often find things just make you wonder why anyone would ever want to buy it

For example, things like bowling trophies from 1986.

Sunday, March 17, 2019

Building a Wireless Speaker

The completed entertainment system
Completed wireless speaker

After a few months of puttering away on the junkyard entertainment system, the end is finally in sight.

With the completion of the display and DVD units of the system, the only thing left to do to complete the system was to give it a voice.

As you may recall in a previous post, I constructed and tested an infrared transmitter and receiver system that would allow the entertainment system to transmit sound wirelessly. Now that we have installed the transmitter part of this arrangement into the DVD player, we needed to give the receiver the same treatment.

Therefore the focus of this post will be on building a wireless speaker. Even though these particular speakers will be for our entertainment system, you can build these for almost any situation where you would like to have wireless sound.

Construction of the speaker itself is fairly straight forward since it really comprises of 3 main components:
  • A Speaker
  • A cabinet for the speaker
  • The infrared receiver to drive the speaker. 
Almost any speaker will work. In my case, I picked up some very inexpensive car speakers that came with their own speaker grill at my local surplus store. 

Likewise, the speaker cabinet in itself is fairly easy to build. 

To build the cabinet, I based the dimensions around the speaker grill and the depth of the speaker itself.  Based on that information I determined that a finished speaker cabinet of 6 inches by 6 inches with a depth of 5 inches would work the best. 

Armed with that information, I cut out four pieces of 1/2 inch birch 6 inches wide but a little longer than 6 inches in order to allow for some trimming for length later.

Sunday, March 10, 2019

The Quest for Cheap Lumber


Being someone who is frugal - OK, Let's be honest, I'm cheap -  I'm always on the lookout for a great bargain.

One thing that always bugged me over the years was that the price of wood just seemed to get more and more expensive. For a lot of years I used pine almost exclusively for all of my projects since that was the cheapest wood that I could buy.

Now, I don't really have anything against pine. I find it to be a very nice wood to work with, can be very forgiving of any small mistakes that I may make and looks very attractive when it's finished in a nice coat of varnish.

But there are a lot of nice types of wood out there, especially hardwoods that have really nice grain patterns like Maple or Oak that I wish I could use without taking out a second mortgage.

Out in the rural areas where I live, there are a lot of road side stands that sell firewood for people that are going camping or want a little fire to roast marshmallows in the backyard. I should also mention that there are a good number of Mennonite furniture makers in my area, which leads to today's tale.

On the way home from work one day, I thought it would be a good evening to have a nice fire in the backyard and unwind from a busy day. With that in mind, I stopped at a road side stand that was selling a very large bag of wood for $3. Getting out of the car and looking at the bags of wood for sale, I noticed one thing...

Sunday, March 3, 2019

Project - Solar Powered Vacuum Tube Display


One of my hobbies involves the reviving of antique radios. I suppose it's basically just a natural extension of what intrigues me - that marriage between wood and electronics.

Back when they were new, antique radios were considered to be a major purchase for a family and as such they were traditionally considered fine furniture. As a result the cabinets that housed the electronics for these radios often were built out of expensive woods like walnut or oak and were built to a high level of craftsmanship.

I always took a lot of joy in restoring an old beat up cabinet to it's previous glory and to have the electronic bits inside sing once again.

Back in those days there were no transistors, instead the function that transistors handle today were manged by vacuum tubes. While vacuum tubes certainly worked quite well (in fact audiophiles today swear that the best sound come from vacuum tube amplifiers) and their glow was always a welcome sight, they did have a tendency to burn out after a while.


During my radio rescue efforts, I had managed to accumulate a bit of a collection of defunct vacuum tubes. Now personally, I had always found the design of these tubes to be quite interesting and I never could bring myself to throw them out. 

Now I didn't really want them to just still in a box in a closet somewhere, so why not put them on display?

With this project I think I managed to give these old tubes a place of honor with the added bonus of restoring some of that glow they used to give off.  

I am also very proud to say this project was a runner up in the Instructables 2017 Solar Contest.