Sunday, February 28, 2021

Making a Voltage Gauge for Your Car - A Retro Popular Mechanics Project


While cars today are technological marvels that seem to have so many smarts built into them that they seem to almost drive themselves - I can distinctly remember when I first got my 2017 Honda Ridgeline out on a road trip and being a little freaked out at first when I would feel the steering wheel turn by itself when I was going into a curve on the road. 

Unfortunately, as the cars get smarter, the less they seem to want to tell the driver how the car is doing mechanically. Many years ago a lot of vehicles had gauges on the dashboard that told the driver such pertinent details as the old pressure, coolant temperature, and battery/alternator voltage. Except for some pickup trucks, most cars these days only give you the engine temperature as a gauge, relying on warning lights when the oil pressure and voltage get too low. The issue is that by the time you see a warning light, is usually too late and you are stuck by the side of the road. 

With gauges, you had the opportunity to spot trouble before it had a chance to leave you stranded. The movement of a needle on a dial off of its normal spot would always give you a clue that things were starting to go bad under the hood. 

As I mentioned in one of my previous posts, I have been browsing through the back issues of Popular Mechanics magazine. The other day I was leafing through the October 1977 issue when I came across an article on building a testing tool that measured the health of your car's charging system.

Sunday, February 21, 2021

Building an Apartment Sized Workbench - Part 2


By looking at it, you wouldn't think this was a workbench

Last week I started work on a small workbench that I could use in my house for those little jobs that didn't really warrant a trek to my larger shop. 

At the end of the week, I had a somewhat functional workbench and if it was going to end up in the shop or in a garage, I could have called it good and finished the build there. But since it was going to be living in my home, it really needed to at least somewhat blend into the rest of the furniture in the house.  I really needed to dress it up a bit more. 

Sunday, February 14, 2021

Building an Apartment Sized Workbench - Part 1


Starting to build an Apartment Workbench

After building a stand for my3D printer, I also quickly realized that I also needed to have some sort of small workshop space in the house.

Now don't get me wrong, I am still going to have the "big" shop, however, it is a few miles down the road from my house, and sometimes, it's just not worth the trip if I have some sort of quick or small project that needs to be done. 

My 3D printer is currently sitting comfortably on its stand in a corner of my family room. Looking at where I have it located, I noticed that I just had enough space beside it for a little work area and I did have a fair bit of scrap wood pieces leftover that was still looking to be put to good use.  

Looking at the space around the 3D printer, I figured that I could put it in a small work area that would be about 2 feet wide and 16 inches deep. While not a lot of space, it should be sufficient for the small projects that I had in mind. 

I also wanted to make the workbench something that could more or less blend into the family room, meaning that I wanted to make it look more like a cabinet, allowing for the storage of tools and supplies within the workbench, hidden away from sight. 

Due to its small size, this would make a very nice accessory for someone who lives somewhere like an apartment, but would like to have their own dedicated "shop space". 

Sunday, February 7, 2021

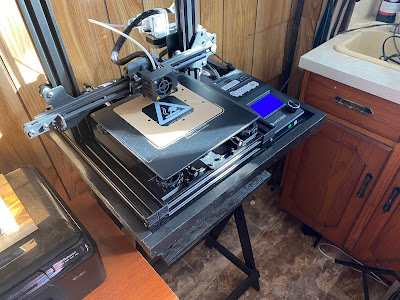
Building A 3D Printer Stand - A Scrap Wood Challenge


A custom stand for my new 3D printer

In my last post, I talked about the new toy that I had gotten myself for Christmas. 

While I really do enjoy trying it out and making parts for some projects that I hope to feature here soon, I did have a bit of a problem with it. At the moment it's sitting on a countertop here in my home and it's starting to get a little in the way of the day-to-day activities in the house. 

I really needed to have a more dedicated place to put my 3D printer. 

The simplest solution was to find a pretty simple stand that you could probably pick up at the local Walmart or even a simple "box" made out of wood would do. 

Over the past weekend, I was doing a bit of a clean-up of my lumber stash in the shop and I noticed that I had a rather large selection of odds and ends wood pieces. These pieces were typically either odd shapes or widths (like thin strips of plywood) or were materials that I usually would not use - like slabs of particle board that I had salvaged from old flat-pack furniture.  

I never had the heart to pitch those parts, since they were in good shape and I always kept telling myself that I would find a use for them someday. Unfortunately, someday never really arrives, so those wood outcasts just stayed piled up in the corner of the shop, neglected and forgotten. 

So, I decided to challenge myself to find a new life for those forgotten ones - I would challenge myself to try and make some sort of stand for my 3D printer out of them.

Part of the challenge was to not really follow a strict plan of construction (though I would have a basic concept sketched out as a starting point) and I was to use only the scrap wood that I had - my supply of "good" wood was to be off-limits. 

While it is only going to be a tool stand, it will be also sitting in my house. So while it doesn't necessarily need to be built like fine furniture, it should at least look somewhat attractive.  

With that in mind, I set about coming up with my concept.