Showing posts with label Project. Show all posts

Sunday, December 20, 2020

Easy To Build Bike Repair Stand Revisited

A simple little stand for bike repairs - going to you from 1980

The other day I got a bit of a brainwave on a project that involved a small gasoline engine and an old bicycle, 

As luck should have it I happened to have a small gas engine and an old bike! However, like any good project, success lies in planning and preparation. 

I realized that this project needed to have the bike up off the ground in order to make working on it a little easier and to prevent the bike from making an uncontrolled trip when I was testing the engine. 

It was then a dim memory from my childhood sparked in the back of my brain...

Even as far back as elementary school, I was always a bit interested in tinkering. Often with very crude results. 

One year, I got a subscription to Popular Mechanics for Christmas. Every month, for that year I got a nice little present in the mail and I spent hours going over the magazine from cover to cover. 

I distinctly remember looking at all the woodworking and electronic projects that were highlighted, always feeling a bit glum that I didn't have the access to the neat tools needed to make those projects (Even if I did, I don't think anyone in their right mind would give a 12-year-old kid access to stationary power tools) 

However, the woodworking gods smiled at me when the July 1980 issue arrived in my mailbox (yes, I know, I'm old). 

Sunday, August 16, 2020

Digitizing 35mm Slides with a Smart Phone

Build your own slide converter rig

Recently I got into a bit of a nostalgia kick when I found a box of old 35mm film slides at my parent's house a few weeks ago. 

Finding those slides brought back memories of sitting in a dark room, watching pictures of someone's recent trip someplace far away.  I can remember the click of the slide projector as it cycled through to the next slide, the smell of the hot bulb in the projector, and of course, watching the odd upside-down slide flash up on the screen. 

This was an experience that is now lost to time since we live in a streaming YouTube world. 

Millions of these slides now languish on the back of closets, forgotten. 

The really nice thing about 35mm slides was that they typically had a high-quality image, almost rivaling the high definition quality of the pictures that we can take on our smartphones today. 

There is a lot of history lock up in those slides, the problem is that without a projector of some sort, they remain locked inside their square cardboard sleeve. 

I developed a plan to rescue the slides that I had found by converting them into a digital format. You can purchase devices on Amazon that can convert slides for you, but again, my cheapness kicked in when I saw that even an inexpensive converter was around $150. 

Recently, I picked at an auction a lot of old slide viewers for a few dollars. The viewers were used to preview slides before you put them into a slide projector's carousel.

Most of the viewers had a small viewing window that had a small lightbulb inside to light up the slide. However, one particular viewer used the light from the room to illuminate the slide, and the slide was viewable as a large image. 

As an experiment, I tried to take a photo of a slide as it was seen in the viewer with my smartphone. I was actually quite pleased with the image quality that I got on the phone. 

So between this old slide viewer and my smartphone, I had the makings of a converter for my box of slides. 

Sunday, August 9, 2020

Building a Cheap Elliptical Trainer

Exercising the legs

Every Father's Day I always have the same issue, what do you get for a Dad that already has every conceivable tool and gizmo you can think of? (mind you, I have also noticed that my kids have a similar problem). 

Most years the situation was solved with the purchase of a gift card from his favorite tool emporium, but even that gets a bit stale after a couple of years, and you end up back at square one again. 

In the past couple of years, my Dad has started to have a few mobility issues which could be greatly helped with some regular exercise of his legs. 

A neighbor of theirs recently got an elliptical trainer for this exact same purpose and they claim that it made a world of difference for them. Grabbing onto this as the perfect gift for Dad, I did some online shopping for something similar. 

After quickly noticing the $500 - $1,000 price tag, I quickly had to do a bit of a rethink. While my father is certainly worth the cost of such a machine, I did have a bit of issue about paying that much for what was basically a fancy box with pedals sticking out of it. - effectively a fancy unicycle that doesn't go anywhere.

From what I could gather, the basic premise of the trainer is to provide a low impact way of giving the benefits of riding a bicycle, including providing a measure of pedaling resistance to build leg strength.

It was then it struck me that I already had the building blocks for building my own elliptical trainer out in the parts bin that is my shed.

Sunday, July 5, 2020

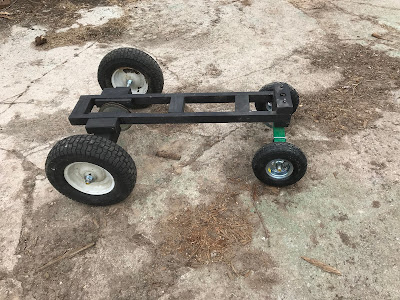
Building a Garden Tractor Out of Wood - Trying to Power the Wheels

About to build a drive train


The last time I worked on the tractor, I had mounted the engine to the tractor. Now I was faced with the prospect of attaching the engine to the rear wheels so that the tractor could actually move under its own power.

As I mentioned at the start of the build, I wanted to keep all the moving parts of the tractor's drive train as far away from my limbs as possible, My idea was to use the vertical drive of the lawnmower engine to connect it to the rear wheels with a drive belt that would have a 90-degree twist to a secondary set of pulleys that in turn would be connected to the rear wheels. 

I got the idea for this arrangement from a set of plans for a wooden go-kart that has its wheels powered via that type of arrangement.

I'm not entirely sure how successful I will with this since I am not entirely sure how the belt will stay on the pulleys with that severe of a twist, but I am willing to give it a try. 

To start the build, I first gathered up the various parts that I needed to make the drivetrain. 

Sunday, June 14, 2020

Building a Garden Tractor Out of Wood Update - Getting Things Rolling


Starting to get things rolling

A few weeks back I embarked on building a small garden tractor based on plans that I had found in a copy of Mechanix Illustrated from 1941.  The unique thing about this tractor was that it was built completely out of wood. 

I managed to put together the chassis for the tractor, so the next step would be to attempt to put some wheels on to create a rolling chassis. 

Sunday, March 22, 2020

Building an Aquarium Stand - Step 3: Building the Body

We focus on building the body of the aquarium stand

In my last post, I had just completed building the top of the aquarium stand.

One of the key items that I needed to figure out for the stand was the overall dimensions of the aquarium that I would be using, the reason for that is that it dictated the overall dimensions for the top of the aquarium stand, which in turn determined the size of the body and base of the stand.

So with the top sorted out, I started working my way down, making next item on the agenda building the body of the aquarium stand,

The design of the stand was that the body of it was going to be basically a large box with some internal storage in order to allow for stashing fish food and other supplies. The box will also need to be built heavily enough to support the weight of the aquarium when it's full of water (which could weigh over 100 pounds).

Sunday, January 26, 2020

Making Drink Coasters from Scrap Wood

From scrap wood to beautiful coasters

I was looking for something that I could build to take advantage of the laser engraver that I had recently purchased. I really wanted to find an excuse to etch some really nice detailed images as part of some sort of wood project.

The laser engraver really gives me the ability to really make some very elegant looking items, but the question was what to make...

A few weekends ago I had a chance to check out a couple of craft shows in my area along with my significant other. I don't really go to these shows to really buy anything, but rather they are basically scouting missions for me to find ideas for potential projects.

At the shows, I did find a lot of different things on sale that utilized laser engraving, but alas a lot of the items for sale were fairly large, far larger than anything my engraver could tackle.

However, I did see a lot of smaller items, like Christmas ornaments and drink coasters that were laser engraved.

Intrigued by what I saw, I remembered that I had a rather large assortment of small wood scraps leftover from other projects lurking in my scrap box. A good majority of those pieces included scraps of Eastern red cedar and maple which have really attractive wood grain patterns and colors.

Once I got back home and back into the shop I got right to it.

Sunday, January 19, 2020

Searching for High Altitude Balloons

With a quick trip to the hardware store, I started to see balloons


A little while back I posted about my exploration in tracking gliders that were soaring around my area with a software-defined radio and some open-sourced software.

As I had mentioned, it all started with a mysterious phone last summer. Later that fall, I got yet another call from my new glider friend, wondering, since the gliding season was over for the year, would I be interested in tracking high altitude balloons instead.

It turns out that there is a bit of an enthusiast community out there that track and if possible, recover high-altitude balloon payloads. A good majority of these balloons are the good old weather balloon that is still very much in use in our high tech world today since they can easily ride along the jetstream, but the military also use balloons in preparation for artillery exercises and there is also an active amateur radio community that use balloons to transmit radio traffic.

The central repository of all high altitude balloon knowledge can be found at habhub.org. The site includes information on how to set up a tracking station using a software-defined radio dongle - similar to the one I used for tracking gliders.

Setting up a receiving station is fairly well documented at the site, so I won't really focus on how to do that since I will leave that to the experts at Habhub to explain. But I did find details a little skimpy on what sort of antenna to use.

Sunday, November 3, 2019

Table Saw Stand from Pallets

A stand fit for my new table saw

As I may have mentioned in previous posts, things have been going under a bit of a transformation in the shop. 

This summer marked a move to some better (albeit still "small") shop space. As part of this move, I decided to treat myself to an upgrade to my old table saw. 

In my past couple of posts, I've discovered and have been experimenting a little with that outcast of the shipping world, the lowly pallet. 

Since I was impressed on how well my new workbench had turned out. I wanted to continue my experience of using pallets to further improve conditions in the new shop space. 

My new table saw is classed as a compact table saw which is meant for use at construction sites. While a very capable saw, in order for it to be used properly, it really needs to be set securely on a stand or a tabletop. 

When I looked at what a store-bought stand would cost, I realized that I was looking at least a couple of hundred dollars for a custom stand for the saw. 

Since I had a few leftover pallets from my workbench project sitting in the corner of the shop, something told me that I could probably build something similar for a lot less money. 

Sunday, October 27, 2019

Building a Workbench out of Pallets

A nice workbench made from pallets

In my last post, I had talked about the veritable treasure trove that I found when I came across a sign pointing the way to some free wood pallets.

After doing a couple of more hunting and gathering trips for pallets, I finally lucked upon some pallets that were 8 to 10 feet long courtesy of a local fencing business.

Once I got the pallets home and disassembled, I ended up with a good supply of 8 and 10 foot 2X4 boards which were used as the stingers for the pallets.

8 to 10 foot stringers

Earlier this summer, I moved my shop to a slightly larger space (don't worry, it's still a small workshop so I won't be changing the site's name any time soon). Because of this move, I now had the opportunity to finally have a proper workbench and allow me to retire the old Black and Decker Workmate that had served me faithfully for many years.

Since I was fairly keen to try a project with recycled pallets, I figured that a basic workbench would be the perfect first project.

My criteria for the workbench was pretty simple. It needed to be large and strong enough to hold any large pieces that I may be working on. It also needed to be at a height that would allow me to work without too much strain on my back.

I determined that a workbench with 4 feet by 5 feet working area set at a height of 3 feet would be the best fit for me.

From there I drew up some quick plans.

Sunday, October 6, 2019

Project - Junkyard Desk Chair


What sparked this project was a sudden need for a new desk chair.

The back of my old desk chair was broken the other day when I leaned back a little too far. Thankfully the only other thing that got injured was my pride.

When I popped out to the store to look at getting a new chair, I was downright shocked by the prices that are being asked for a desk chair these days.

Then it struck me, during the little tours of my local auto salvage yard, I did notice that there were an abundance of very well made seats that if you looked at them the right way, could make very serviceable desk chairs.

At around 20 dollars for a seat, the price was certainly right.

After a quick trip back to the salvage yard, I started work on building my Junkyard Desk Chair.

Sunday, September 29, 2019

Project - Solar Powered Flower


Last winter I noticed that I had accumulated a sizable collection of small 5 volt DC motors which I had salvaged from a bunch of old CD ROM drives.

Trying to think about what I could do with these motors, I played around with them a little bit to come up with some ideas. It was during these experiments that I realized that when one of these motors were hooked up to a solar cell that I had laying around, it seemed to spin the motor at a very good rate. From there, an idea was formed.

Sunday, July 28, 2019

Building an Inexpensive Desk Part 3 - Making the Drawer Cabinet

Next up - the cabinet for the drawers

In my last couple of posts, I went through the construction of the top and body of my desk. 

If I chose, I could have just joined the 2 pieces together at this point and I would have had a nice, simple functional desk.

However, as with anything that is made to order, the recipient for this particular desk had a need to have someplace to store their "stuff" so that it wouldn't be cluttering up the top of their desk, or even worse, sitting in a box beside the desk. 

More specifically, they wanted the desk to have drawers. 

In of itself, building drawers for the desk is a fairly straight forward concept. It's basically a matter of building a bunch of small boxes that would fit into a bigger box. 

The deceiving part in all this is that getting the small boxes to fit properly can take quite a bit of fiddling, but I am getting ahead of myself. 

For this post, the focus will be on the construction of the "big" box, or the cabinet that will eventually house the drawers. 

Sunday, July 7, 2019

Project - PiAware Radar Kiosk


Earlier this year, I became aware of a very interesting company called FlightAware which offers flight tracking of both private and commercial aircraft throughout the world. As part of its service,

Flight Aware relies a lot on crowdsourcing of its tracking data from thousands of private radio receiving stations that monitor the Automatic Dependent Surveillance-Broadcast (ADS-B) signals of any aircraft that are flying overhead.

These signals provide the GPS location, altitude, speed and direction of the aircraft, which can be easily received by a radio receiver and sent to FlightAware to provide real-time tracking.

The beauty of this arrangement is that this information can be received and sent by a lowly Raspberry Pi and a very inexpensive SDR (Software Defined Radio) dongle. This type of receiving station is more commonly known as a PiAware station.

Having a spare Wi-Fi enabled Raspberry Pi on hand, I was pretty intrigued by this and after ordering a $20 SDR dongle off of eBay, I was up and monitoring the airplanes in my area.

One of the neat features of the PiAware system is that you are able to see a real-time map of what your PiAware station is receiving via a web interface that you can view on a computer that is part of your WiFi network. As an added bonus, the PiAware web interface also gives a live weather radar picture for my area.

That's where there the inspiration for this project started. I also had a rather elderly Raspberry Pi 1 Model B kicking around. While the old girl was a bit slower than its newer siblings, it still had a lot of life left in it. As part of my investigation on what I could do with an old Pi - I stumbled upon some details on how you can use a Raspberry Pi as a web browser kiosk - similar to those that you see in places like airports to display up to date information.

And with that, the SkyAware Radar Kiosk was born.

Sunday, June 2, 2019

Project - The Backwards Alarm Clock

You really need to look twice to figure out the time


This project originally evolved from another project that I had made several years ago.

Back then I created a clock that hung on the wall in my office at work.  What made this clock unique was that I was able to make the hands move backward by making a very simple change to the clock movement. At that time, the clock caused a few of my co-workers to do a double take.

Fast forward to today, I was recently in need of a new alarm clock. While it would have been pretty easy to pop down to the store and buy a regular run of the mill clock radio, I figured that this would be a great opportunity to try my hand at building another backward clock - but instead of  having it just hang on a wall, it would serve as my new wake up tool.

All the gory details on how I built this clock can be found here

Sunday, April 7, 2019

Project - Junkyard Compass and Thermometer

Junkyard compass and thermometer

This project was born from a need to address a couple of features that I wanted to have in my truck.

The first feature was to have an electronic compass to serve as a companion to my 2 meter amateur radio rig. As a severe storm spotter, knowing what the direction is of the weather that I'm observing is essential for when I need to radio in my reports.

The second feature is more along the lines of creature comforts. Many vehicles these days have an outside temperature read out feature, however you very rarely find one that will display what the temperature is inside the vehicle. I always wanted to know what the actual temperature is in the car when I'm driving (and it's a great help in solving those age old debates that you sometimes have with your passengers on whether it's "too hot" or "too cold" )

For more details on how you can build one of your own, just click on this Link

Sunday, March 3, 2019

Project - Solar Powered Vacuum Tube Display


One of my hobbies involves the reviving of antique radios. I suppose it's basically just a natural extension of what intrigues me - that marriage between wood and electronics.

Back when they were new, antique radios were considered to be a major purchase for a family and as such they were traditionally considered fine furniture. As a result the cabinets that housed the electronics for these radios often were built out of expensive woods like walnut or oak and were built to a high level of craftsmanship.

I always took a lot of joy in restoring an old beat up cabinet to it's previous glory and to have the electronic bits inside sing once again.

Back in those days there were no transistors, instead the function that transistors handle today were manged by vacuum tubes. While vacuum tubes certainly worked quite well (in fact audiophiles today swear that the best sound come from vacuum tube amplifiers) and their glow was always a welcome sight, they did have a tendency to burn out after a while.


During my radio rescue efforts, I had managed to accumulate a bit of a collection of defunct vacuum tubes. Now personally, I had always found the design of these tubes to be quite interesting and I never could bring myself to throw them out. 

Now I didn't really want them to just still in a box in a closet somewhere, so why not put them on display?

With this project I think I managed to give these old tubes a place of honor with the added bonus of restoring some of that glow they used to give off.  

I am also very proud to say this project was a runner up in the Instructables 2017 Solar Contest.

Sunday, February 3, 2019

Project - Flickering Solar Garden Light


This particular project got a mention on the Show and Tell page in the Volume 66 issue of Make Magazine.  So of course, I'm thrilled that these little experiments that I build in my shop are actually considered worthy by people that I consider much more talented in the art of making stuff. 

The main spark for this project was a chance discovery at a local ham-fest. One of the vendors there had a very large assortment of LED's for sale. Looking a bit closer, I immediately noticed that he had some LED's on display that mimic the flickering of a candle.

Seeing the possibility, I bought a pack of 10 of the LED's and went back home to the shop,

After some tinkering, I came up with a very neat solar garden light that I build from some scrap wood and a very simple solar charging circuit in order to keep the LED glowing.

All the details on how you can build one can be found here.

Sunday, January 13, 2019

Project - Building a Raspberry Pi Crypto-currency Miner


Bitcoin and other crypto-currencies have been in the news a fair bit recently. That caused me to start getting a bit curious, (as an IT guy) on what all the hub-bub was about.

As I started reading more about the mechanics behind Bitcoin, I learned that the fundamental backbone of crypto-currencies was the use of block chain - a concept that is becoming important in the IT world these days.

As part of learning about this, I wanted to try my hand at mining some crypto coin for myself. As part of this little experiment, I built a small crypto-currency miner out of a Raspberry Pi.

Of course, as an extra bit of added flair, I also had to build a little mining shack for it

Read about all the details here.

Sunday, December 9, 2018

Project - Junkyard Radio to Table Radio


This project I was always particularly proud of.

Back in 2016 this project was a runner up in the 2016 Instructables Amps and Speakers Contest. I was pleasantly surprised by the comments that were generated by what I had thought was a fairly straight forward process of just hooking up a radio and putting it in a nice box.

Some of the comments I received were from people who were experts in car audio. Needless to say, I learned a lot more than I expected, and it has encouraged me to try other projects that utilize audio - for example the car DVD player that I've been playing with in my previous posts.

Two years later, the radio is still going strong. In fact it's playing in the background as I type this.


Details on how to build this neat little radio can be found by clicking on this Link