A few weeks back I mentioned that I had hatched a bit of a diabolical plan for a project that involved an old bicycle and an equally old small engine.
The engine in question was actually a 2 cycle engine that was part of a grass trimmer that was manufactured back in the early 1990s and has sat for several years and not in working condition when I got it.
Obviously, for it to be of any use to me, I needed to get it working again.
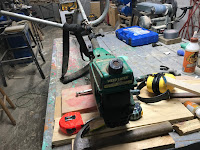
To make the engine a bit easier to work on, and considering it going to be surplus for my needs anyway, I decided to start by removing the "grass trimmer" part of the grass trimmer.
This was done by removing the driveshaft and cutter from the engine.
Thankfully the driveshaft of most grass trimmers is pretty easy to remove. Most of the time, the driveshafts are usually attached to the engine via a friction fit with the help of some sort of clamp.
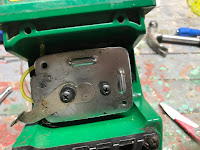
This is no different in the case of this particular trimmer since the driveshaft is secured with a couple of bolts that clamp the engine housing onto the driveshaft. After removing the bolts, the shaft just slides out.
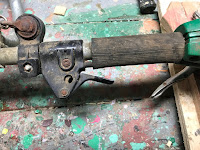
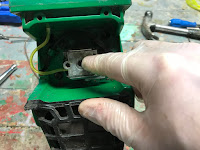
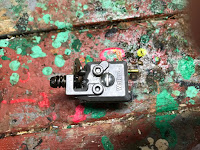
While the driveshaft was now free, it was still somewhat attached to the engine thanks to the throttle cable. The cable was attached to the driveshaft via a trigger switch that was clamped to the driveshaft and by a rubber molding that was around the shaft.
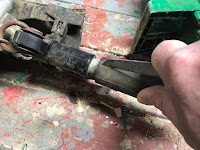
Removing the molding was pretty easy, I just simply cut it off, being careful to not damage the cable underneath.
The trigger was a bit more of a challenge The switch was attached to the shaft with the use of a clamp that was secured to the shaft with a nut and bolt. In this particular case, the bolt was severely rusted and could not be removed normally. To remove the bolt I ended up drilling out the head of the bolt until the clamp was released.After that, the trigger switch easily slid off the driveshaft and the engine was free.
Now that I had the engine isolated, it was time to dive in and try to bring it alive again.
I'm not a small engine mechanic of any description, but I did know the "GAS" rule for an engine to run - Gas, Air, and Spark.
I figured the easiest place to start with my investigation was with "Spark"
To check for spark, I needed to remove the sparkplug from the engine.
I pulled off the sparkplug wire from the plug and removed the plug with the help of a socket wrench with a standard sparkplug socket.
A quick inspection of the plug showed no obvious carbon build-up or any other evidence of trouble, so with just a quick sanding on the electrodes, the plug was ready for business.
The next thing to check was to see if there was any juice going to the sparkplug.
To do this, I needed to see if the plug was generating any spark when the engine turned over.
With spark plugs, the engine block acts as the ground for the circuit that fires the plug. Normally this occurs when the plug is inserted into the engine and the spark is happening inside the cylinder. That would make it a bit tough to see.
To see the spark, I needed to ground the plug to the engine block through some other means. To do that, I took some bare wire and wrapped one end of it around the base of the sparkplug. The other end of the wire I stuck into the spark plug hole in the engine, making sure it was in contact with the engine block.
I gave the engine a couple of spins and I was awarded some blue sparks at the end of the plug.
Now that I confirmed that "Spark" was present, I moved on to "Gas".
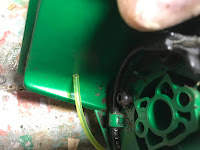
That was where I found an obvious problem. The fuel line had basically turned to dust
This is actually a pretty common issue with gas trimmers and it's actually a pretty easy job to do.
A quick trip to Amazon and I got pretty much a lifetime supply of gas line for a few dollars.
With this particular gas trimmer, the gas line went through the bottom of the tank and connected to a fuel filter cartridge inside the tank - which was now rattling around in the tank. A couple of shakes and the filter fell out of the gas tank's filler hole.
To get at the hole in the tank to feed the line through, I needed to remove the air cleaner, choke, and carburetor.
This was a pretty straight forward process where the air cleaner was removed by undoing 2 screws, which exposed the choke and carburetor.
In turn, the coke, which is basically a metal plate with a flap was connected to the carburetor with 2 screws, which as it turned out also held the carburetor itself to the engine.
After everything was removed, I now had plenty of space to work.
Feeding the fuel line through the opening in the gas tank was a bit of a tight fit. To feed the line, I first cut the end of the line into a wedge shape and fed it into the opening.
On the other side of the opening, I grabbed the end of the line with needle-nose pliers and gently pulled the line through the opening until I had a length of the line inside the tank.
At that point, I reconnected the fuel filter to the end of the line and stuffed it back into the gas tank
On the other end, I snipped off the fuel line so that I had about 4 or 5 inches of line coming out of the tank and connected it to the fuel intake port of the carburetor.
After that, I reattached the carburetor, choke and air filter to the engine, put some fuel in, and gave the starter a pull.
It definitely ran, but not very well. I needed to have the choke on to keep it running, and it was running a bit rough when it did run.
Also, the throttle was not moving very easily.
It was getting Gas, time to check the "Air".
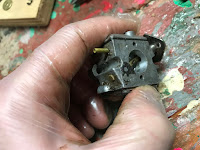
So, off came the filter, choke, and carburetor again, and I started to give the carburetor a closer look,
The carburetor on a 2 cycle engine is actually a lot simpler than its 4 cycle brother.
Basically, there are 3 parts to it - there is a "pump" on one end that injects fuel and air into the carburetor, a central intake that contains the throttle value, and a float that maintains the fuel level.
I actually found a really nice video that does a great job of explaining the details on how they work and I actually learned a lot by just watching this video.
Based on my newfound knowledge, I determined that I should check the little mesh screen on the fuel input for the carburetor's pump, which is actually a fairly common problem and prevents the engine from getting enough fuel, which is one reason that you would require more use of the choke to run the engine.
Getting at the pump side of the carburetor is fairly easy, you look for the end that has the fuel line intake, which identifies where the pump is located. After that, you remove the screw and carefully remove the plate that covers that end of the carburetor.
This exposes the fuel and air channels for the intake. In one of those channels, there should be a little mesh dish which is the fuel screen.
I removed the screen with some gentle prying of a small screwdriver and gave the screen a quick cleaning with some carb cleaner.
Once I had things nice and clean, I carefully replaced the screen back in its recess and I reattached the metal cover on the carburetor
The next thing that I noticed was that the throttle valve was stuck, which meant that I had no throttle control for the engine.
I figure the best way to get it unstuck is to take the valve out of the carburetor and also give it a bit of a cleaning.
To do that I first removed the main throttle valve by removing the screw that held it to the valve shaft.
With the valve removed, I next removed the throttle valve shaft from the carburetor by carefully removing the retaining clip from the one end of the throttle valve and pulling the shaft out of the carburetor from the other end.
Once everything was cleaned, I reassembled the throttle shaft back into the carburetor.
On the end of the shaft that did not have the retaining clip, there was a connection point for the throttle cable and a spring that kept the throttle closed (for idle) when the cable wasn't being pulled.
As I was installing the shaft, I made sure that there some tension put on the spring before I fully seated the shaft back into the carburetor. When the shaft is back in place, I tested the spring tension by moving the throttle cable lever. The spring should move the shaft back to its original place whenever I release the lever.
After that, I reattached the throttle valve to its shaft and the carburetor was back together again.
I then reinstalled the carburetor, choke and air filter back on the engine, put some gas in, and started it up again.
This time it nicely idled with the choke off, and the throttle moved freely, with the engine revving nicely.
After a long slumber, the engine is alive once more.













No comments:
Post a Comment