Showing posts with label pine. Show all posts

Sunday, July 12, 2020

Wipe Your Paws! - A Simple Laser Engraved Sign

Wipe your feet before entering

After using my little NEJE laser engraver for a little while and not managing to permanently blind myself by staring at the laser as if I was a moth to a light bulb, I figured that I could graduate up to something a bit more deadly powerful.

After reviewing the offerings on hand on Amazon, I settled on a 2.5-watt engraver that had the magic mix of being cheap but having very good reviews by what seemed to be actual humans (though I do hear that the bots are starting to get pretty smart these days 😀) 

The laser also had a much larger engraving surface - which really opened up the project possibilities that I could consider.

Sunday, July 5, 2020

Building a Garden Tractor Out of Wood - Trying to Power the Wheels

About to build a drive train


The last time I worked on the tractor, I had mounted the engine to the tractor. Now I was faced with the prospect of attaching the engine to the rear wheels so that the tractor could actually move under its own power.

As I mentioned at the start of the build, I wanted to keep all the moving parts of the tractor's drive train as far away from my limbs as possible, My idea was to use the vertical drive of the lawnmower engine to connect it to the rear wheels with a drive belt that would have a 90-degree twist to a secondary set of pulleys that in turn would be connected to the rear wheels. 

I got the idea for this arrangement from a set of plans for a wooden go-kart that has its wheels powered via that type of arrangement.

I'm not entirely sure how successful I will with this since I am not entirely sure how the belt will stay on the pulleys with that severe of a twist, but I am willing to give it a try. 

To start the build, I first gathered up the various parts that I needed to make the drivetrain. 

Sunday, April 12, 2020

Building an Aquarium Stand - Step 5: Adding a Door

A door for the aquarium stand

With the major components of the aquarium stands now built, I just needed to do one more thing before I put everything together,

As I mentioned in my initial design sketches for the stand, I wanted to have a door to cover up the front storage opening in order to hide all of George's food and supplies.

Sunday, April 5, 2020

Building an Aquarium Stand - Step 4: Building the Base

The aquarium stand base

With the body of the aquarium stand out of the way, the last major component to build the base of the stand.

Since the base of the aquarium stand is going to have to carry the full weight of the aquarium along with the stand itself, I needed to engineer in a lot of extra strength into the base, however, I needed to make sure that it reflected the character of the rest of the stand.

To build in that strength, I decided to have the stand predominately built out of a much heavier material - 2X4 lumber.

Sunday, March 22, 2020

Building an Aquarium Stand - Step 3: Building the Body

We focus on building the body of the aquarium stand

In my last post, I had just completed building the top of the aquarium stand.

One of the key items that I needed to figure out for the stand was the overall dimensions of the aquarium that I would be using, the reason for that is that it dictated the overall dimensions for the top of the aquarium stand, which in turn determined the size of the body and base of the stand.

So with the top sorted out, I started working my way down, making next item on the agenda building the body of the aquarium stand,

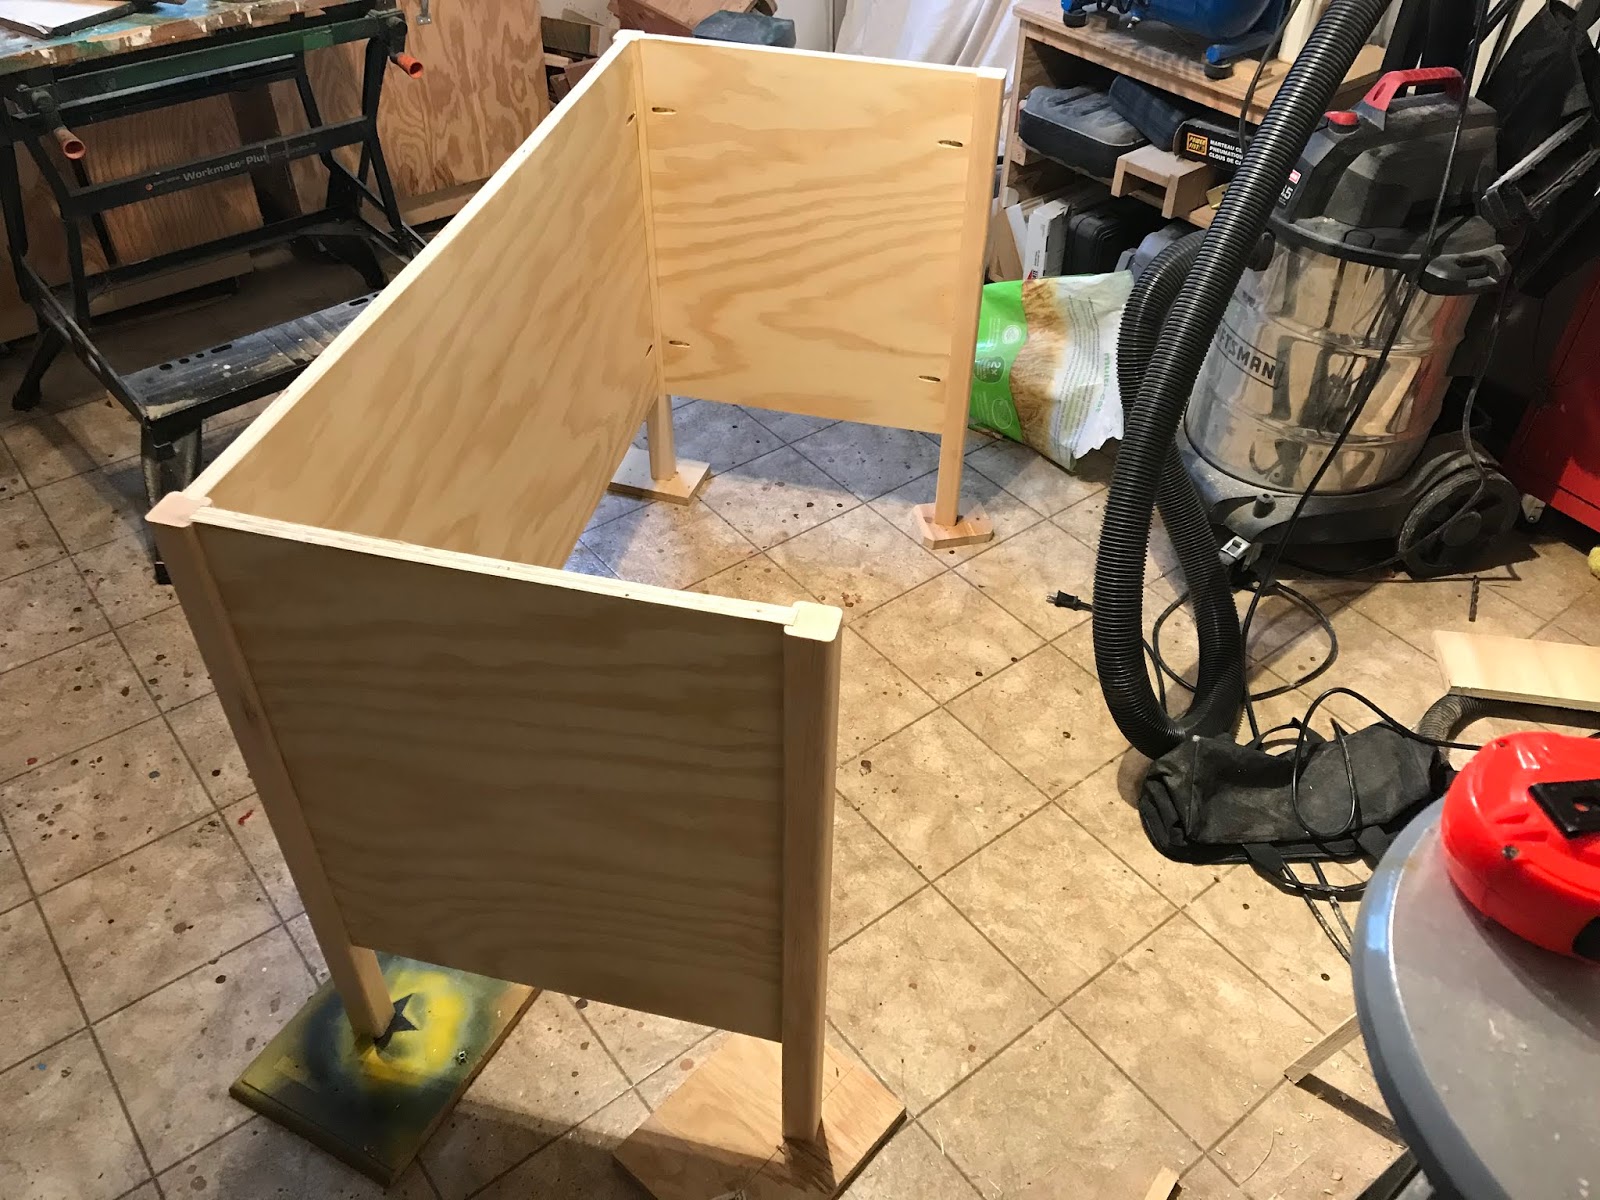
The design of the stand was that the body of it was going to be basically a large box with some internal storage in order to allow for stashing fish food and other supplies. The box will also need to be built heavily enough to support the weight of the aquarium when it's full of water (which could weigh over 100 pounds).

Sunday, March 15, 2020

Building an Aquarium Stand - Step 2: Building the Top

Ready to start the build

In my last post, I sketched out a bit of a design for an aquarium stand that I wanted to hold a tank to house George, our tame Sunfish.

With my plan of attack determined, it was finally time to head into the shop and start building.

As I previously mentioned, I designed the aquarium stand to be constructed in three distinct parts (top, body, and bottom).

Since the stand will be custom-built for the aquarium, the first logical step would be to start from the top.

The first step in the process was to find out the footprint of the tank.

Sunday, March 8, 2020

Building an Aquarium Stand - Step 1: Determining a Design


For several years, I've always enjoyed doing a little fishing during the warmer months.

I find fishing to be almost a zen-like experience.

Sitting quietly in a boat, watching the water ripple around me, focussing my senses on a thin monofilament line, trying to sense a bite. I often find the experience quite relaxing and even if I don't catch anything, I always come home rejuvenated. 

While what I may call relaxing, others in my house would call it boring, so my fishing experiences have more or less been done solo. So it was much to my surprise that my son wanted to try his hand at a fishing derby that I usually take part in during the fall.

I was even more surprised when he actually enjoyed it enough that he wanted to do a couple more fishing excursions before the snow started to fall.

Typically we fish for Smallmouth Bass or Perch, so when during our last trip of the season my son caught a rather small Sunfish, I was fully expecting him to let the little guy go and keep fishing for bigger quarry.

Instead, he slipped the fish into the minnow bucket and we ended up taking him home with us.

Sunday, February 16, 2020

Building a Simple Recliner Platform

Sturdy yet attractive

I'm probably within that demographic that could be referred to as the "sandwich" generation where I have young adult children that we are helping to get started in the world, but at the same time, I also have parents that are starting to get a bit older.

While my parents are still active and very capable in doing their own thing, they are also starting to find doing certain things are not as easy as they once were (to be honest, I am getting the same way - after redoing a floor in my house a few months ago, my knees were not very happy with me for a few weeks).

Recently my father mentioned that he was having a pretty tough time getting out of his favorite reclining chair. After some discussion, we figured that if the chair was maybe a couple of inches higher he could get up much more easily.

Now there are chairs out there that have lifting mechanisms that help you get out of the chair, but why spend over a thousand dollars on that sort of thing when there's a perfectly good chair sitting in the living room?

After some discussion, we figured that some sort of platform for the chair to sit on would fit the bill. So, before I left the workshop for the day, we decided that my father would get the measurements for the base of the chair and I would get going with the construction when I returned.

Upon my return the next day, I did get the measurements but was also informed by my parents that they had gone ahead and built their own platform.

My family comes from traditional farming stock where the main focus is function. Aesthetics is very low on the priority list.  When I inspected their handy work, it was indeed a very sturdy and highly functional platform, but from a design point of view, I suppose you could charitably define it as  "rustic".

I had to be a bit careful in how I critiqued their handiwork, but eventually, they liked the suggestion that I could try and clean up their creation a little.

So I grabbed their platform and headed back to the shop

Sunday, December 29, 2019

Making a Hydraulic Clamp

With 2 tons of pressure, it does a very effective job of clamping

Recently I wanted to try my hand at turning some bowls on my lathe using some hardwood scrap pieces that I had leftover from other projects. I wanted to create the bowls that had an alternating layer of different wood types in order to give the bowl an interesting appearance. 

With my first couple of bowls, I created the bowl blank by layering the wood pieces on top of each other and clamping everything together as tightly as possible with standard wood clamps. 

On the whole, everything glued together so I had a relatively solid piece of wood to work with, 

However, I did find that I sometimes got fine little gaps between the glued layers.  The downside of this was that when I turned the bowl, I would sometimes see daylight shining through those gaps in the bowl's side.   

While it is something that the typical person would likely not notice, and I could "cheat" by using wax to finish the bowl (the wax would fill in the gap), I really wanted  to be proud of my projects, and seeing a flaw, no matter how minor, always seems to bug me. 

I think the issue with the gaps is that no matter how hard I clamp the wood, I do not seem to be able to apply consistent pressure along the entire surface of the piece that I was gluing together. 

Sunday, October 20, 2019

Long Live the Lowly Pallet

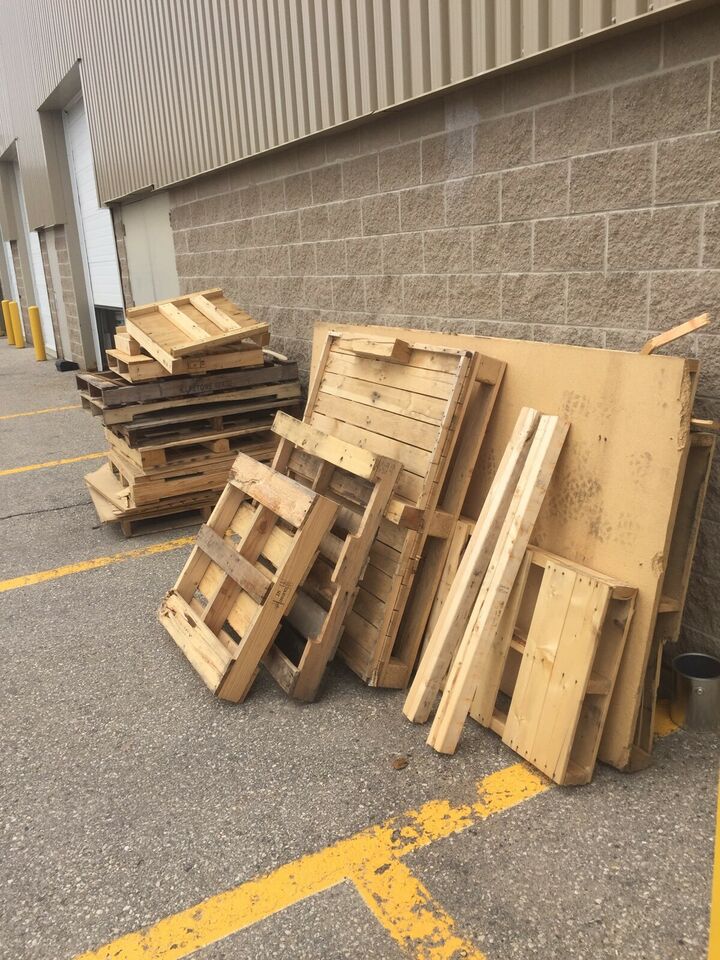
A plethora of pallets!

As you may know, I am a bit of a sucker when it comes to looking for cheap ways of getting wood for my projects. 

Previously, I mentioned that I had great success in scoring some very nice wood pieces from scouring the "firewood" bins of a few local furniture craftsmen in my area, however, the wood that I tended to get was a little on the small size - great for small projects, but not so much if I wanted to build something that had a bit of size to it. 

A couple of weeks ago I was running some errands when I came across a large sign that had a magic word on it -  Free! 

It certainly got my attention

The free item in question were pallets.

Intrigued, I pulled over and saw a mother-lode of pallets.

Sunday, August 18, 2019

Quick Tip - Making Wood Corners Look Seamless

A nice tight corner - or is it?

When trying to build something that is intended to be "nice" - be it a piece of furniture, or a potential heirloom piece, I try to take as much care as possible when I am building them, making sure that each cut is exact, and every part fits together as tightly as possible.

In spite of my diligence, I do seem to have a bit of a problem when it comes to cutting 45-degree corners.

Sunday, August 11, 2019

Building an Inexpensive Desk Part 5 - Assembling the Desk

Desk is finally built!


Over the past few weeks I've been building this desk as a series  of separate and distinct modules.

The time for the big payoff is here - I can finally assemble those modules together into an actual desk.


The person that I am making  of this desk had just asked me when they would be getting it - so I better get cracking and get this done...

Sunday, August 4, 2019

Building an Inexpensive Desk Part 4 - Building Desk Drawers

Desk Drawers - ready to install

The last time I worked on the desk, I had just completed the construction of the cabinet that I will be using to house the drawers. 

As I mentioned in my last post, the drawers basically just a bunch of smaller boxes that will be fitting into the bigger box that is the drawer cabinet. 

While it may sound simple, there is a fair bit of finagling to be involved in order to make this all work. 

Sunday, July 21, 2019

Building an Inexpensive Desk Part 2 - Building the Body

This time around we build the body of the desk

In my last post, I went over the construction for the top of the desk. While we now have a really nice work surface, it's not really much good without something for it to sit on.

So our focus this week will be on creating the body for our desk.

Sunday, July 14, 2019

Building an Inexpensive Desk Part 1 - Making the Top

The first piece of the desk to be built is the top

One of the biggest challenges of having a small workshop is that whenever I have a need to create a project that is a bit sizable, things can get a bit.... cramped.

A few years ago I was browsing the DIY section at my local book store when I came across a book written by Danny Proulx called "Simply-Built Furniture".

What struck me the most about the book was that Danny had showcased how to build some really elegant looking furniture with nothing really more than plywood and common sized pine boards.

At that time I was really in a need for a desk that was large enough to hold all of my amateur radio and computer equipment. One of Danny's plans included a large executive desk that also included a hutch.

On the surface, it looked like a pretty ambitious project, however, with the simplicity of his method of construction, I was able to create a really nice looking and very functional piece of furniture.

Sunday, June 2, 2019

Project - The Backwards Alarm Clock

You really need to look twice to figure out the time


This project originally evolved from another project that I had made several years ago.

Back then I created a clock that hung on the wall in my office at work.  What made this clock unique was that I was able to make the hands move backward by making a very simple change to the clock movement. At that time, the clock caused a few of my co-workers to do a double take.

Fast forward to today, I was recently in need of a new alarm clock. While it would have been pretty easy to pop down to the store and buy a regular run of the mill clock radio, I figured that this would be a great opportunity to try my hand at building another backward clock - but instead of  having it just hang on a wall, it would serve as my new wake up tool.

All the gory details on how I built this clock can be found here

Sunday, February 3, 2019

Project - Flickering Solar Garden Light


This particular project got a mention on the Show and Tell page in the Volume 66 issue of Make Magazine.  So of course, I'm thrilled that these little experiments that I build in my shop are actually considered worthy by people that I consider much more talented in the art of making stuff. 

The main spark for this project was a chance discovery at a local ham-fest. One of the vendors there had a very large assortment of LED's for sale. Looking a bit closer, I immediately noticed that he had some LED's on display that mimic the flickering of a candle.

Seeing the possibility, I bought a pack of 10 of the LED's and went back home to the shop,

After some tinkering, I came up with a very neat solar garden light that I build from some scrap wood and a very simple solar charging circuit in order to keep the LED glowing.

All the details on how you can build one can be found here.

Sunday, December 9, 2018

Project - Junkyard Radio to Table Radio


This project I was always particularly proud of.

Back in 2016 this project was a runner up in the 2016 Instructables Amps and Speakers Contest. I was pleasantly surprised by the comments that were generated by what I had thought was a fairly straight forward process of just hooking up a radio and putting it in a nice box.

Some of the comments I received were from people who were experts in car audio. Needless to say, I learned a lot more than I expected, and it has encouraged me to try other projects that utilize audio - for example the car DVD player that I've been playing with in my previous posts.

Two years later, the radio is still going strong. In fact it's playing in the background as I type this.


Details on how to build this neat little radio can be found by clicking on this Link


Sunday, August 12, 2018

Project - Building a Junkyard Clock


In this first post I would like to give a tutorial on how to build a very stylish clock out of some scrap wood and a quick visit to your local auto recycler. In recent years a lot of auto manufacturers seem to go towards a more "retro" look in some of their styling. As part of this movement, a number of cars have been using the more traditional analogue clocks versus digital clocks.

As time goes by, all cars eventually end up in the junkyard. In a lot of "you pull" junk yards, clocks are not a very high demand item, and a very well-made clock can be had very cheaply ($4 at my local junkyard).

The goal of this project is to show how to make an attractive desk clock from a clock salvaged from the junkyard - the perfect gift for the family gearhead! For all the details on how to build this very "moving" clock, click on this Link for the instructions.