Today my smartphone has replaced to need to have a calculator, digital camera, notebook, among other things.
In a recent upgrade to my smart phone's operating system, I can even now use my phone as a bubble level and tape measure.
One thing that smartphones have been excelling at recently is capturing of high definition video, which means that my old camcorder can now be put out to pasture along with my old Casio graphing calculator.
Recently I got a new toy (which I will post about in the future) and I wanted to try my hand at making an unboxing video that all the cool kids seem to be doing these days and I figured this would be a perfect thing to record with my smartphone.
The gotcha here was that in order to do an unboxing, I really needed to be able to use my 2 hands - meaning I couldn't really hold my smartphone and unbox my new toy at the same time.
Luckily I still had my old tripod from my camcorder - I just needed some way to mount my smartphone to it.
A quick Google search paraded a plethora of mounts for my tripod - all way, way above the price I would be willing to spend for what really is not much different from a smartphone holder you can get for your car (which I could easily get for less than 2 dollars down at my neighborhood dollar store).
After one such trip to my dollar store, I ended up coming home with one of those cheap car phone holders - and an idea.
The plan was simplicity itself.
While I was at the dollar store I found a phone holder that fits into the vent of a car for around a dollar.
The holder attached to the vent via a small clip that upon closer inspection, looked like it was attached to the smartphone holder via a small screw, meaning that it could be dissembled and modified fairly easily.
Once I got home with my prize, I did a quick scrounge of the junk drawer in the shop and came up with:
- A 3-inch zinc corner brace (you can also pick one up for a couple of bucks at the hardware store)
- A 1/4 inch #20 zinc nut (you can get one for a few cents at the hardware store too).
The size of the nut is a bit critical since 1/4 #20 is the standard thread size that is used on camera tripods.
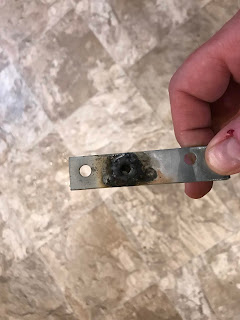
The first thing I needed to do was to attach the 1/4 inch nut to the bottom of the corner brace so that is could act as an attachment point for the tripod.
Since I wanted to make this as strong of a bond as possible, I decided to weld the 2 pieces together.
For this purpose, I used an Oxy-Map gas torch kit since I don't typically do a lot of welding and this outfit was a lot cheaper to buy than a full-fledged arc welder.
Once I got the gas torch set up, I placed the 1/4 nut in the center of the corner brace and welded everything up.
I'll be honest, welding isn't my strong suit. but at least the nut is on securely.
To clean up the weld a bit I gave the nut a quick trip through the bench grinder.
After the clean up I gave all the metal pieces of the mount a quick coat of rust paint.
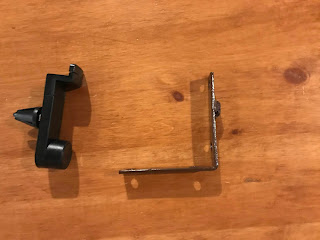
The next step was to attach the cell phone holder to the corner brace.
I started by removing the part of the phone holder that attached it to the car's vent.
I first removed the plastic sleeve that covered the vent attachment by just pulling it off.
Looking at the metal clip underneath I confirmed that it was held in place to the back of the phone holder with a small screw.
Removing the screw also removed the clip from the smartphone holder.
Looking at the corner brace, I noticed that there were a series of pre-drilled holes that would have normally been used to attach the brace to a box or a shelf.
Looking at the screw I just removed from the phone holder, I noticed that the screw was about the right size for it to fit into the holes in the corner brace.
This fortunate turn of events meant that I didn't need to drill any holes!
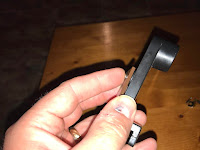
All I needed to do was put the screw into the corner brace hole and attach the smartphone holder to the corner brace with the screw.
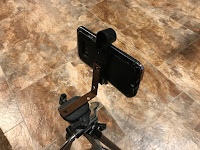
Voila! My smartphone tripod mount was complete.
The only thing left to do was to attach the mount to the tripod using the 1/4 inch nut, place the smartphone into the holder and start making movies.
The really nice thing is that this mount only cost me a little more than a dollar since I had the other bits that I needed lurking in my junk drawer.
If you had to buy all the parts, it still would only cost you around 5 dollars - A far cry from anything I could find online.


No comments:
Post a Comment