Towards the end of summer, I always make a pilgrimage north to do a little bit of fishing.
Since the place that I usually go has a decidedly poor coverage area for cell and internet signals, I find that those few days of fishing to be my time to fully disconnect from the world and recharge my body and spirit.
The type of fish that I go for typically is the type that will go only for the freshest of bait - for some reason they are just not easily fooled by artificial lures.
They especially seem to have a fondness for minnows, which, for those that aren't familiar with all things fishy, are a small fish that about an inch or two long - just the right size for the big ones that I am angling for to swallow in one bite.
The issue is that the minnows up north know this too, and tend to be very timid about being captured for use as live bait.
The minnows in the creek near my house however, don't seem to have this fear and are easily persuaded to enter my minnow trap with a few bits of bread.
The challenge is how to transport my minnows so that they stay alive and well for the 2 hour trip to my fishing spot. The key to transporting minnows is to make sure that they have plenty of oxygen in the container that I am hauling them in.
The traditional way to do this is to use an aerator to pump oxygen into the container. For most bait aerators, this is usually a battery-operated device that uses an electric motor to pump air.
While this makes the pump very portable, it does have a bit of a shortfall in that the batteries do tend to run out after a period of time, which with my luck, would occur at the halfway mark of my trip.
With the number of USB power outlets in cars these days, I wondered if I could make some sort of adapter where I could power my pump, but without modifying the pump so that I could still run it off batteries if I chose later on.
One thing that I will mention is that this wouldn't be an adapter that could run anything electronic unless it was something that specifically called for 5 volts (which is the output voltage for USB). In the case of my aerator pump, the motor ran on 1.5 volts, but since it is basically only a DC motor, running 5 volts should be fairly safe (it may even juice up the performance a bit).
To start, I first removed the battery cover for the pump and took a look at the battery compartment.
This particular aerator utilizes two D cell batteries connected to the pump's motor as a parallel circuit in an attempt to maximize the amount of time that the pump can run without having to change out the batteries.
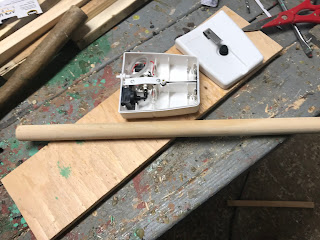
To make an adaptor, I needed to have something to substitute in place of a D cell. A D cell battery has a standard diameter of 1.3 inches. Looking around in my scrap bin, I found that I had a section of 1.25-inch diameter dowel that would be an almost perfect fit for the battery box.
The nice thing about dowel is that I can find that common sized dowel diameters can make fairly close substitutes for common battery sizes:
- 5/16 inch diameter dowel = AAA cell battery
- 1/2 inch diameter dowel = A cell battery
- 1-inch diameter dowel = C cell battery
To figure out what lengths I needed to make my battery substitutes, I measure the length of the compartment for one of the batteries, making sure to add a little extra to the length so that the negative terminal spring would be under a bit of pressure when the adaptor is inserted, making sure to hold the dowel in place.
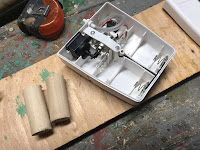
Based on this, I cut two dowels into 2.5-inch sections.
A quick test fit of the dowels in the compartment confirmed that the dowels had a nice snug fit between the battery terminals
While the dowels had the general shape of a battery, they weren't really conducive for electrical work since wood is a very good insulator.
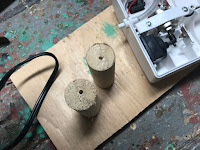
To create electrical connection points on the dowels, I wanted to screw a 5/8-inch wood screw on one end of each dowel.
In order to prevent any possible splitting of the dowel when I inserted the screw, I first drilled a small pilot hole on one end of each dowel.
Next, I attached the screws into the dowels at the pilot holes that I had just drilled.
Once the screws were in place, I gave the dowels another test fit into the aerator, making sure that the screws were able to make contact with the battery terminals.
Since I had used screws that had Robertson's heads, I found that the hole in the screw heads fitted nicely with the little nub at the end of the battery terminals, make it an even more secure electrical connection.
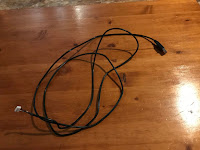
The next step in the process was to add the USB connector. For this, I started by salvaging the USB cord from a defunct mouse and stripped the insulation off of the end of the cable that was attached to the mouse.
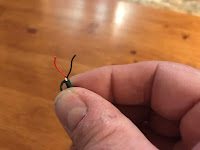
I clipped back all the wires from the end of the cable except the red and black wires, which are the positive and negative 5-volt wires respectively for the USB cable.
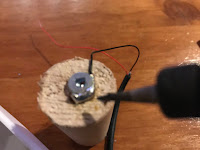
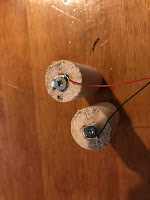
Stripping the insulations from the red and black wires, I then wrapped each of the bare wires around one of the screws on the dowels.
At this point, I wasn't sure how the screws were going to take solder, but I was very pleased to see that it was very easy to solder the wires to the screws.
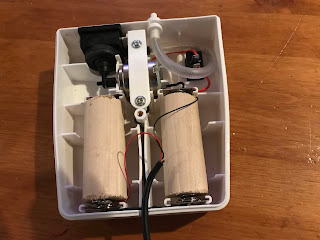
Once the wires were soldered up. I then reattached the dowels to the aerator, making sure that the positive and negative USB wires were connected to the appropriate battery terminal on the pump.
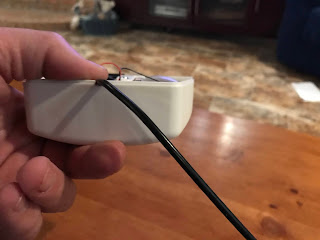
The final step was to reattach the battery cover to the aerator. Luckily in the case of this particular aerator, there was a small slot at the bottom of the battery cover, which was just the right size for the USB cable to fit in.
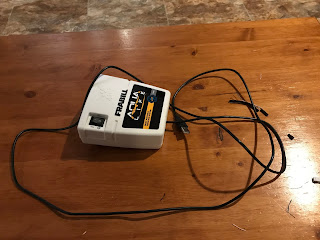
With the cover attached, the aerator is ready to test.
So, how does it work?
As I expected, with the 5 volts going through it versus the expected 1.5 volts, the aerator is pumping a lot more air than it normally would, which is not necessarily a bad thing.
About the only thing that I am wondering about is whether this would shorten the life of the aerator. I suppose the ultimate will be when I make my trip up North - I'll let you know how I made out.









No comments:
Post a Comment