If my posts to date have been any indication, I seem to have developed a bit of an attraction to things that other people have considered to be just junk, since I seem to be drawn to places like junkyards, surplus stores and so on.
So at this point it shouldn't be much of a surprise on where I got the raw ingredients for this project.
In some of my spare time, I volunteer to keep a small computer lab operational for a local charitable group. Due the budget (as in, no budget) that I have to keep the lab going, I sometimes need to get creative in sourcing my replacement parts for the lab computers. In my area, the local landfill has an e-waste program where people can drop off their old electronics. As you can imagine, that would include a significant number of old computers. With the permission of the landfill staff, I usually take a look in the e-waste bin every time I drop something off at the landfill, with the hope of finding some much needed parts.
The last time I visited the bin, I didn't really see any computer parts that I could use, but something else did catch my eye,
 |
| The original digital photo frame |
Sitting in a box of what appeared to be old wall-wart power supplies was what appeared to be an old digital photo frame. Taking a quick look at the frame, I saw that the decorative portion of the frame was pretty beat up, but the actual electronics looked to be fairly intact.
I was a bit curious on whether the screen still worked or not. Figuring that the worst case would be that I would need to make a return trip back to the e-waste bin to return the frame, I took a chance and took it home.
The frame looked to be powered by a 12 volt power supply and had input slots for either a USB stick or a SD card. Once I got the frame home, I plugged in a 12 volt wall-wart supply that I had in my junk drawer, plugged in a USB stick that had some jpeg files on it and turned the photo frame on.
 |
| It Works! |
It immediately came to life and started showing pictures.
Just to make sure that there wasn't anything lurking that had doomed the frame to the landfill, I kept it running for a couple of days just to make sure nothing strange happened.
A couple of days later, things were still quite happy.
Now that I had established that the electronics was in perfect shape, I really wanted to do something about the frame. The original frame was basically a very cheap affair made from some combination of particle board and plastic. For showing special memories, the frame really needed to be more substantial than it was.
In my scrap wood box, I had some reasonably small pieces of oak that I really wanted to find a use for - the perfect material for a new frame!
To start the project, I needed to remove the electronic components of the photo frame from the frame structure. In the case of this frame, the screen and related electronics were attached to the frame with six screws. When the screws were removed, the screen just simply lifted off the frame.
With the electronics removed, I then removed the glass and border of the frame and set them aside for later.
I then cut four 3 inch wide oak strips and using the old frame as a guide, cut the strips to a length that was a couple of inches longer than the old frame.
Since I wanted to make the frame reasonably decorative, the project then effectively became an exercise in using the router.
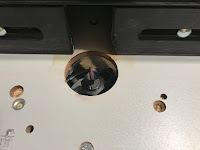
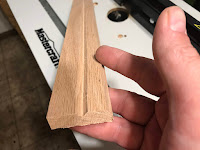
The first step was to add a decorative concave curve on the outer edge of the frame, which was done by running the outside edge of the oak strips through the router with a cove bit.
I then decided to put a small V groove into the middle of the frame for a bit of a decorative effect. This was done with my trusty groove bit with the router fence moved out enough so that I could put the groove in the middle of the strip.
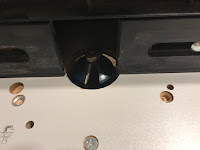
With the groove in place, I then rounded over the other edge of the oak strip. This was done with the help of my router's round bit.
Finally I wanted to have a slot in my frame to hold in place the glass and frame border. To do this I used my router's straight bit and cut a 1/4 inch slot underneath the edge of the strip from where I just rounded over the edge.
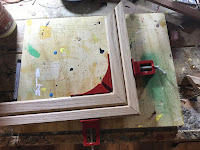
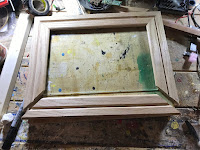
With the decorative touches in place I can now build the frame itself. Using the old frame as a guide, it simply was a case of cutting the oak strips to size based on the size of the old frame. Once the pieces were cut, the frame was assembled using wood glue and corner clamps
I would like take a moment to share a little tip of mine....
One problem that I have with corner joints is that sometimes you just can't get them tight enough, leaving these small gaps in the joints. While the glue is still wet, I will rub in a small bit of saw dust into the gaps, which the glue will hold in place once its dry, and as a result - closes the gap.
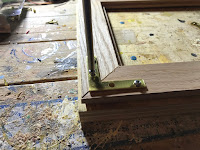
When the glue was dried, I further reinforced the frame with some brass corner braces which I attached to the back of the frame
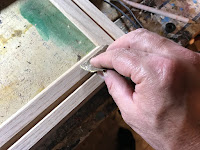
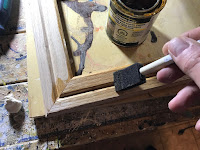
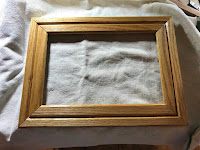
After some sanding and a couple of coats of spar varnish, the digital photo frame was ready to be assembled again.
Assembly is basically the reverse from the disassembly. First install the glass (remember to give it a good cleaning first!), followed by the border, and finally the screen. Attach the screen and the electronics module to the frame with the six screws, and you're done!
The final step is to plug the screen in and turn it back on - hopefully it's still alive after it's surgery...
This turned out to be a very simple project that really transformed the look of this screen.
Needless to say, it will be a long time before this screen sees the e-waste bin again!









No comments:
Post a Comment