It's been a while, so I thought I should give a bit of an update on the junkyard DVD player project.
With my last update I had built a wireless sound function to the DVD player with the addition of a pair of infrared transmitters and receivers.
Now that the electronic part of the project has been sorted out, I now needed to look into how we should package everything up.
My intent for this project was to have everything contained in a wooden cabinet so that it could very easily fit in a home setting. The woodworking part of this project will be separated into two parts; building a case for the DVD player, and a frame for the LCD screen.
For this update, I'll focus on building the case for the DVD player.
For this project, I wanted to make things as functional as possible with as little frills as possible - basically I'm just building a box. For this box, I used some 1/2 inch birch that I had laying around the shop. In order to make things as neat as possible, I wanted to have the corners of the box meet at a 45 degree angles.
I started by taking measurements of the DVD player in order to get the width and lengths of all sides that I needed for the box. For the length of the box, I added an extra 2 inches to the length in order to allow some working room for adding the infrared transmitters later on.
I then cut out 4 pieces of birch to the sizes that I had measured with a miter saw, making sure that all the corner edges where cut at a 45 degree angle.
When I started to assemble the box around the player, I encountered my first hiccup.
When the DVD player was installed in the minivan, it was attached using screws through a mounting flange that is part of the DVD player housing. Unfortunately these flanges stick out from the side of the DVD player, preventing a proper fit for the case. I needed to remove those flanges. A few minutes work with my rotary tool soon addressed that but removing the flanges.
I then started work on the case. The first thing I did was to add a 1/4 inch deep groove along one end of the box side pieces. The purpose of the groove was to add some clearance for the face plate of the DVD player. This was done with a 1/2 straight bit on the router table.
Once the grooves were cut, I then switched the straight bit on my router to a round over bit and rounded over the edge opposite to the side where I had put the groove.
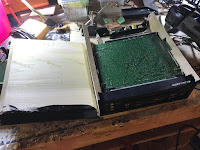
I then started to do a bit of a test fit of the case pieces with the DVD player. During the test fit, I did find a couple of complications.
The first thing I found was that the DVD player had a exhaust fan coming out of one side. Obviously I needed to provide some way for the hot air to vent from the player.
To create a exhaust vent in the side of the case, I first marked the location of the fan on the corresponding side piece for the case.
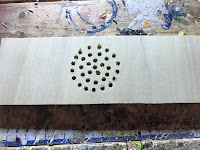
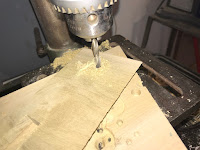
Once the location was marked out, I then drilled out a series of small ventilation holes within the location that I marked into the side.
With the ventilation holes in place I then glued the side piece to the case bottom.
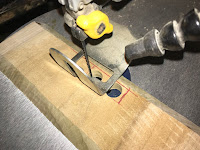
To create the access for the connector, I followed the same process that I followed for the ventilation holes, I first traced out the location of the connector and then I drilled out a pilot hole in the middle of the area that I had traced out and cut the opening out with a scroll saw.
In order to make sure that I had cut the opening to the right size, I made a test fit of the video connector in order to make sure that everything was good.
Once I had confirmed that the video connector slot was the right size I then glued that side of the case to the case bottom.
Next I drilled a 5 mm hole about an inch from the back of each case side in order to allow for the installation of the infrared transmitters later on.
With all the holes and openings cut and drilled out, we should be able to button up the case - but sadly no....
A final wrinkle in our plans had popped up - the power connector for the DVD player is positioned pointing up. In order to do what I wanted to do, I really needed the power connector to point out towards the back of the case.
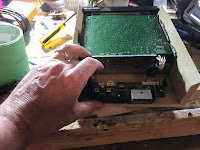
Luckily, the power connector for the DVD player is bolted to the chassis of the DVD player with just a couple of machine screws. Removing the screws allowed me to re position the power connector in the direction that I wanted
With that last hurdle removed, I started to do the final assembly of the case.
I first gave the case a quick sanding.
Then as an added flare I gave the inside groove of the case a coat of black paint in order to blend it in a bit with the front face plate of the DVD player once the case is assembled.
With that, I was able to then do the final assembly of the case. Now for this project, I had to do things a bit out of sequence. In order to make things easier later on, I needed to have the DVD player installed in the case before I applied any final finish to the wood. I just find it easier to do it this way than to have to deal with varnishing many smaller pieces later on.
So, having said that, I installed the DVD player into the case and buttoned it up with some wood glue, held in place with some masking tape until the glue dried.
With that the case for the DVD player was complete.
Next on the agenda will be giving the LCD screen the same treatment.












No comments:
Post a Comment