Among the various bits and pieces that I have floating around in my box of electronic junk, I have accumulated a number of fans from defunct desktop computers.
These fans always very quiet, efficient and they can move a lot of air within a small footprint.
Because of those qualities, I have found that these old computer fans can continue to live on a small desk fan and can be made to run off of one of my computer's USB ports.
Over the years I have made quite a few of these fans.
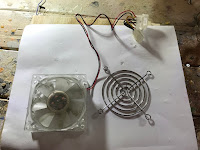
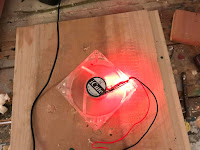
The other day I was digging through the junk box when I came across a computer fan that was made from clear plastic and had some LED's installed around the outside of the fan shroud. Hooking up the fan to a power source showed that the fan did still work, though the LED's were definitely no longer functioning.
The fan also included a small metal grill that added a bit of a decorative touch - the perfect raw ingredients for a new desk fan.
The first thing I did was to cut off the connector at the end of the fan.
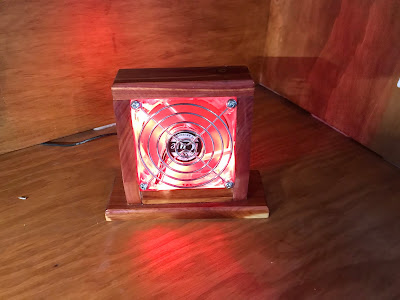
To make it look attractive sitting on the desk, I wanted to build a wooden enclosure for the fan.
For this, I used some leftover pieces of 1/2 inch thick red cedar that I had sitting around from a previous project. These bits of cedar were of various lengths but they all were about 2 inches wide, which make them the ideal width for what I needed.
Computer fans can come in a variety of sizes, so for building the enclosure, it is basically a case of using the fan as a template.
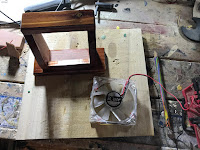
I started by taking one of the cedar pieces and placing the fan on top of it. I then took two other pieces of cedar and stood them up beside the fan on top of the first cedar piece.
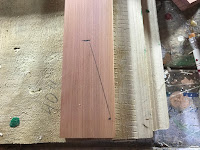
I then measured out 0.75 inches from each side of the fan and cedar pieces and made a mark on the bottom cedar piece at those locations.
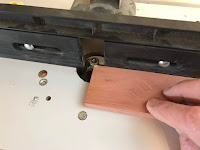
I cut the bottom cedar piece at the marked locations with a saw and I rounded over the edge on one side with the round over bit on my router.
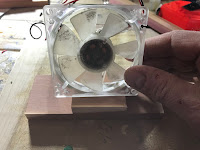
With the bottom of the fan enclosure cut out, I next worked on the sides for the enclosure. I first laid small scrap of cedar on top of the enclosure bottom and sat the fan on top of the scrap piece in an upright position.
Taking another piece of cedar, I then stood it up beside the fan.
I wanted to have the fan blowing at a slight upward angle. Since the fan is a bit thinner than the cedar, I tilted the fan so that the bottom of the fan was flush to the front of the enclosure side and the top of the fan was flush with the back of the enclosure. That more or less put the fan pointing upward at a 15-degree angle.
Once I had the fan at that angle, I then marked the edge of the fan on the enclosure side with a pencil.
I also marked the top of the fan on the cedar.
With that, I had the exact angle that I needed to cut out on the cedar piece. I cut the cedar with a miter saw and cut the enclosure side to the correct height by also cutting it at the location that I marked for the top of the fan.
Using the piece of cedar that I just cut out, I traced the outline of it onto another piece of cedar and cut it out so that I had 2 pieces of cedar in the exact same shape.
Next, I applied some glue to the bottom edges of the sides and using the fan again as a guide, attached the sides to the bottom of the fan enclosure. When I attached the sides I made sure that the sides were 0.75 inches in from each side of the enclosure bottom.
Next, I measured the distance between the outside edges and the width of the top of the enclosure sides and cut out a piece of cedar to fit.
I rounded off the top edges of this piece with my router, applied some glue to the top ends of the enclosure sides and attached the piece of cedar that I just out to the enclosure top.
I then held everything in place with a clamp until the glue dried.
As part of the design for this fan, I created a little space underneath the fan in order to make the appearance of it a bit more neater by creating a space to hide the fan's wiring.
Earlier in the process, I had created that 1/2 inch space between the bottom of the fan the and bottom of the fan enclosure by having the fan sit on that scrap piece of wood while I traced out the side angles.
The next step is to create a little filler piece that will cover the gap in the front of the enclosure between the fan and the enclosure bottom.
I started by cutting out a 1/2 inch by 1/2 inch piece of cedar.
Since the fan is going to be installed at an angle in relation to the bottom of the enclosure, in order to make the filler piece fit seamlessly, we also need to cut the top of it at an angle.
Based on a rough guess, I determined the angle to be about 15 degrees. You can cut that angle with a saw, but in my case, I do have a small benchtop jointer. A couple of passes on the joiner gave me the angle I needed.
I then trimmed the piece to length and glued it in place.
This basically completes the main build of the enclosure. This was a good time to give the enclosure a good sanding and a couple of coats of varnish.
With the enclosure all sorted out I turned my attention to the computer fan itself.
Since I found out earlier that the LED's installed in the fan was no longer working, the first thing I needed to do was to remove the old LED's and replace them with new ones. In the case of this fan, the LED's were in a ribbon, which made removal very easy.
To remove the LED ribbon, I just removed the solder connecting the power wires to the ribbon and removed the solder joint that connected the ends of the ribbon together. After that, the ribbon just popped off the fan.
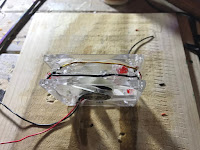
I wanted to replace the LED ribbon with some flashing red LED's that I bought recently. The issue, however, was that the LED's were 5 mm in size - the original LED's were 3 mm.
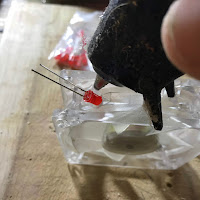
Using a 5 mm drill bit, I carefully enlarged the holes for the LED on the fan shroud.
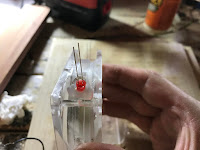
I then installed the LED's into the holes with some hot glue, making sure that the LED's didn't protrude too far shroud into the fan and interfered with the fan blade.
Once the glue had dried I bent over the leads on the LED's so that they contoured more with the outside of the fan shroud.
As a test, I wired up one of the LED's to the power leads on the fan and applied some power.
If everything went well, the fan should still spin without hitting any LED's and the LED that was wired upstarts blinking.
I then went ahead and wired up the rest of the LED's to the fan's power leads with some hookup wire.
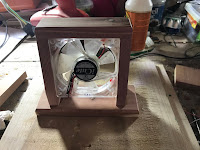
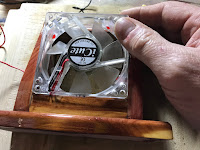
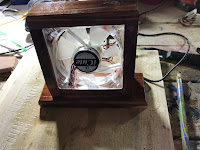
The next step was to install the fan into the enclosure. Since the enclosure was build around the fan, the fan just simply slides into the enclosure, When doing the install I made sure that the fan was flush to the front edge of the enclosure.
Once the fan was in place, I secured the fan into the enclosure with some hot glue.
The next step was to connect the fan to a length of USB cable.
I got the USB cable originally from a defunct computer mouse, but the you can get a USB cable from almost any surplus USB device.
The nice thing about USB cables is that they typically follow a standardized wire color to depict what function the wire is used for.
As we can see in the above diagram, the negative and positive wires follow the standard black and red colors that are used for DC power circuits.
This makes things very straightforward for wiring up the fan. All I had to do was just solder the red wire on the USB cable to the red fan wire and the black wire on the USB cable to the black fan wire.
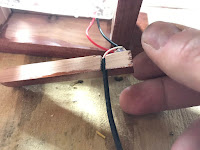
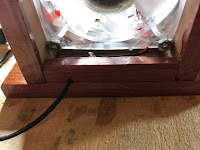
Once everything was wired up, I then cut another 1/2 inch by 1/2 inch strip of cedar and drilled a 1/8 inch hole at a spot along the bottom edge of the strip.
I seated the USB cable into the drilled hole, applied a bit of glue along the bottom of the cedar strip and attached the strip to the back of the fan enclosure bottom.
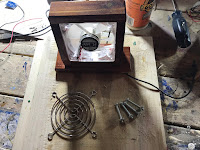
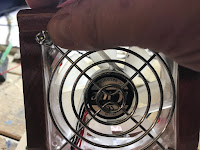
As a final step I then attached the metal grill to the front of the fan with some 1.5 inch long bolts and nuts.
With that, you can now plug in the fan into a USB source and enjoy the light show while staying cool.
I've found this to be a very easy way to reuse surplus fans - I could usually make a bunch of these over a weekend.


















No comments:
Post a Comment