I have always admired the craftsmanship that went into turned wooden bowls so I was always a bit keen to try my hand at making one.
A little while ago I found a small wood lathe that was on sale for a ridiculously cheap price at my local hardware store.So I took advantage of the opportunity and immediately grabbed it.
When I got the lathe home and set it up, I first thought it prudent to at least look at some how to videos on line to figure out to do wood turning. Once I watched a few videos, I determined that I got the gist of it and got right to it.
I immediately put a small block of wood on the lathe, fired up it up and armed with a chisel, took a stab at making my first bowl.
It didn't go very well.
While I could make a real nice wooden cylinder on the lathe, I ran into some trouble in trying to make the "bowl" part of the bowl. When the chisel got caught by the spinning hunk of wood and was flung across the shop where it embedded itself into the far wall, it was time to call it quits.
I figured at that precise moment that perhaps I should do a bit more than watch videos before I tried that again.
Fast forward a couple of months I attended a day long wood turning workshop at one of my local woodworking stores where I was able to get some hands on training on how to properly turn a wood bowl. A really nice bonus was that I also able to come home with a really nice bowl that I made myself.
For anyone who wants to learn how to do any sort of wood turning, I really do encourage that you find a course like this in your area.
The nice thing about the course was that they provided information on how to select and prepare wood for turning, how to safely operate a lathe and what types of chisels to use for the particular cuts that you are trying to make.
By the way - this is how I learned that in order to avoid having to pull my chisel out of the wall, I should have used a bowl gouge chisel and not the roughing gouge chisel that I was using.
So, armed with my new skills, I was really ready to make my first bowl solo.
As part of the discussion on how to prepare the wood for bowl turning, it is fairly important to create bowl blanks as the starting point.
Typically a bowl blank is created by cutting out a rough circle in the size that you want in the wood with a band saw.
While I do have a fair number of tools, sadly a band saw is not one of them.
In order to make a bowl blank, I needed to get a bit creative.
First order of business, I needed to get some wood to serve as raw materials for my bowls. The problem with bowls is that you need to have the wood to be reasonably wide and thick (at least 2.5 inches thick and about 8 inches wide) - you typically won't find wood in this dimension at your local lumber yard.
However usually your local sawmill will be more than happy to provide you with some rough cut wood at the size you need.
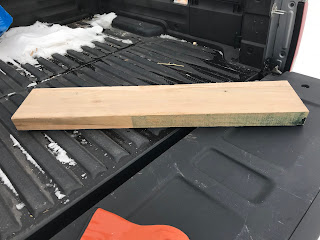
For example I was able to get about 5 feet of a 3" X 8" piece of a nicely spalted Maple for about $20 - which is enough material for about 5 or 6 bowls.
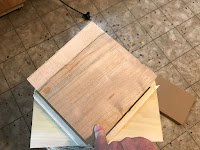
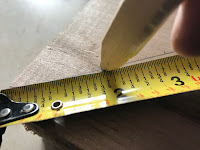
I first cut the maple into 8" X 8" squares
Now typically at this point most wood turners would take these squares and cut them into a rough circle with a band saw and be done with it.
In my case I needed to so something else to make the maple a little more round. The first thing I wanted to do as part of the conversion process was to change the squares into octagons. The easiest way to do that would be to lop off the corners of the squares with the table saw.
To make that happen I needed to make a jig so that I could safely feed the maple through the saw at what typically would a bit of an odd angle.
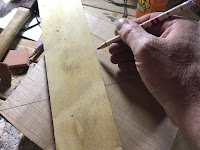
With the jig built, then I first drew diagonal lines between the corners of the maple pieces so that I could have the center of the square marked.
Once that was done, I set the table saw to cut off a couple of inches off the corners of the wooden squares and just cut the corners off the blocks using the jig. .
With the maple now in an "almost" circle shape, in order to finish the job we need do a little bit of turning on the lathe.
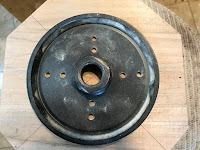
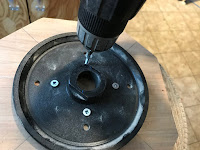
Taking the face plate of my lathe, I placed it on top of the block of maple, making sure that the face plate was centered on the block by using the diagonal lines that I drew earlier as a guide.
Once the face plate was centered, I secured it to the wood with some 1 inch wood screws.
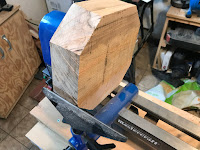
Next I mounted the face plate to the lathe and positioned the tool rest of the lathe so that it was as close as possible to the maple blank with out it getting caught on the corners of the wood as it turned.
Using a roughing gouge chisel and with the lathe turning the blank at a medium speed, I started to carefully chip away at the corners of the blank.
Slow and easy is the name in the game here since it is very easy to have the gouge catch into the wood, which can take a really nasty chunk out of the wood, not to mention that it's not very healthy for your chisel.
Keep chipping away until all the hard corners have been removed.
At this point I switched over to the bowl gouge chisel.
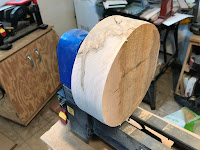
I increased the speed of the lathe and kept chipping away with the bowl gouge until all the flat spots on the blank disappeared.
When done, you should end up with a piece of wood that in in the form of a perfect circle.
Remove the face plate and the bowl blank is complete.
I quickly did the same for the other pieces of maple and stored stored the blanks in a dry place, ready for when the urge to turn a bowl strikes..










No comments:
Post a Comment