One of the biggest challenges of having a small workshop is that whenever I have a need to create a project that is a bit sizable, things can get a bit.... cramped.
A few years ago I was browsing the DIY section at my local book store when I came across a book written by Danny Proulx called "Simply-Built Furniture".
What struck me the most about the book was that Danny had showcased how to build some really elegant looking furniture with nothing really more than plywood and common sized pine boards.
At that time I was really in a need for a desk that was large enough to hold all of my amateur radio and computer equipment. One of Danny's plans included a large executive desk that also included a hutch.
On the surface, it looked like a pretty ambitious project, however, with the simplicity of his method of construction, I was able to create a really nice looking and very functional piece of furniture.
A curious thing started to happen after I built that desk. Other members of my household started to drop hints that they too would like to have a desk, but perhaps not quick so "big" as the one that I had made from the plans in the book.
After some discussion and doodling, I came up with a very simple desk based off of Danny Proulx's design philosophy. I had a number of people requesting a desk so I wanted to create a design that I knew I could assemble fairly quickly and inexpensively.
Because I had to build these desks in a rather confined space, the design had to be such that I could build it in smaller modules that could be assembled into a complete desk.
The design also worked around commonly available sizes of plywood and pine boards in order to cut down the amount of cutting.
In the end, I came up with a design that comprised of 3 major modules:
- The desktop
- The desk body
- A drawer module
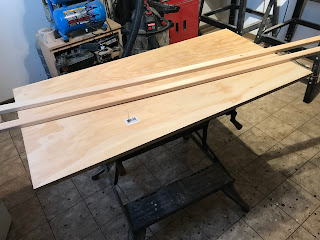
The top of the desk, at its core, is very simply a piece of 2 feet x 4' feet of 3/4 inch Good One Side Plywood that I got pre-cut at my local home improvement store. In addition to the plywood two 5 foot lengths and two, 3-foot lengths of 1x2 pine are used to serve as the outside edge for the top.
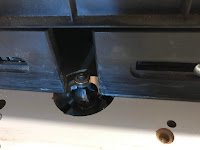
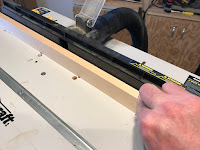
To start building the top, I first rounded over the edges on one side of the 1x2 pine boards with my router table using a round over bit.
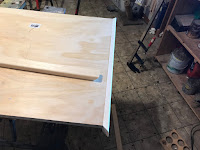
I then took one of the 3 foot 1X2 boards and with my miter saw I cut a 45-degree angle off of one end of the board. When making the cut I made sure that the "long" side of the angle was the side of the board that had the rounded over the edges.
Next, I test fitted the 1x2 on one of the 2-foot sides of the plywood sheet and I marked off on the uncut end of the pine board the end of the plywood side such that I would be able to have as tight corners as possible when I go to attach all the pine trim pieces to the plywood.
I then cut a 45-degree angle at the spot that I marked with my miter saw, again making sure that the long end of the angle cut is on the side with the rounded over edges.
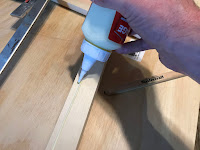
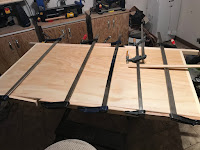
I applied some wood glue along the back of the 1x2 pine board and then I clamped it in place on the plywood sheet, making sure that the top of the pine board was flush to the top of the plywood sheet.
One issue that I have when working with long pieces of wood is that sometimes I don't have long enough clamps to glue something in place. In those cases, I can get some extra length from my clamps by doubling up my clamps by interlocking the jaws of 2 clamps to create one big clamp.
Next, I took one of the 5-foot lengths of 1x2 pine and using the same technique that I used for the 3-foot length of pine, I cut it to size with 45-degree angles on each end and I clamped and glued it also to the plywood sheet, making sure that one end of the board attached into the corner of the pine board that I had glued on earlier as tightly as possible.
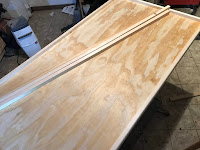
At this point, I now had a plywood sheet that was ringed with 1 x 2 pine boards. Unfortunately, since the plywood was only 3/4 of an inch thick, the pine boards extended down about an inch past the bottom of the plywood.
The issue here was that the pine boards were now fairly susceptible to being yanked off the plywood if they ever got caught by something underneath the desktop (like a desk chair being pulled out from the desk for example).
To more solidly attach the pine to the plywood, I ripped four 4 foot strips of .75 inch by .75 inch pine out of a length of 1X6 pine that I had on hand in the shop,
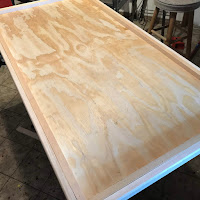
I then flipped the desktop over so that its back was facing up and I cut the .75 inch x .75 inch strips so that I had two four foot strips and two 22.5 inch strips.
I next ran a bead of wood glue along the inside edge of the 1 x 2 pine boards on the bottom of the desktop and attached the .75 inch x .75 inch strips to the back of the 1 x 2 pine boards. To further secure and strengthen the edges, I also attached the strips to the desktop with some 1-inch brad nails.
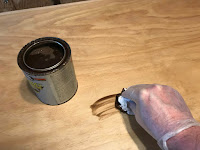
With the construction of the desktop complete, the final step was to give the top surface a detailed sanding with a series of finer grit sandpaper and applied few coats of Minwax Polyshades varnish.
In between the coats of varnish I gave the desktop a light sanding with fine steel wool in order to ensure that the desktop stayed as smooth as possible.
And with that, the first "module" of the desk was complete.















No comments:
Post a Comment