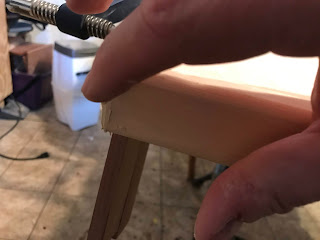
When trying to build something that is intended to be "nice" - be it a piece of furniture, or a potential heirloom piece, I try to take as much care as possible when I am building them, making sure that each cut is exact, and every part fits together as tightly as possible.
In spite of my diligence, I do seem to have a bit of a problem when it comes to cutting 45-degree corners.
Despite taking great care (measure twice cut once after all!) I always seem to end up with a small gap whenever I cut a 45-degree angle from 2 pieces of wood.
I don't know if it's a result of my miter saw is a little bit out of alignment a little or that it's me that's a little bit out of alignment (I tend to think it's me - I've been told a good craftsman never blames his tools 😏), but it's always been a pet peeve of mine.
 |
| In spite of taking great care, I end up with a gap |
In order to eliminate this issue, I came up with a bit of a trick that seems to do a good job of filling those pesky gaps and giving that illusion that the corner was always cut to a nice tight fit.
The secret to this trick is a little bit of neutral-colored wood filler and some sawdust from the wood that you are using for your project (in this case my miter saw was a very willing donor of that magic dust).
 |
| Wood filler and sawdust |
I start by dabbing a little bit of wood filler into the gap to fill it, taking great care that I don't get too much of the wood filler on the outside surfaces of the wood surrounding the gap. The reason is that I have had some experiences in the past where stain would react a bit differently on wood surfaces that had wood filler on it - regardless of how much sanding I did.
Once I got the gap filled, I then took some sawdust and pushed the sawdust into the wood filler.
I keep applying the sawdust until the wood filler closely matches the color of the surrounding wood.
 |
| Applying the filler |
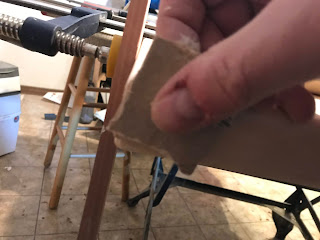
While the wood filler was still a bit damp, I then took some 120 grit sandpaper and sanded the corner so that the wood filler blended in with the adjoining wood pieces so that I no longer saw a defined transition point between the filler and the surrounding wood. The sanding also had the additional benefit of applying more sawdust into the gap, ensuring that the color of the wood filler was a perfect match to the surrounding wood.
At that point, I let the wood filler completely dry and cure overnight.
 |
| Sanding to blend in the filler |
Once the wood filler had cured and with some final sanding with 220 grit sandpaper and you should now have a corner that looks completely seamless
 |
| The finished product |
I've used this trick on a lot of my projects even though I am always striving to get that perfect corner without having to resort to this.
While I am starting to get better in cutting corners (no pun intended) I am always glad that I have this little trick in my bag, just in case.


No comments:
Post a Comment