It all stemmed from a desire to make a clock look better.
Over the past month, I've been experimenting with building wall clocks out of some hardwood that I had salvaged from the pallets that I have been collecting.
The idea was to glue the wooden pieces together and turn them down on my lathe so that they had a nice circular shape and a smooth clock face.
While I was pretty happy with how things turned out on the lathe, I was faced with a bit of a dilemma on how to best put the face on the clock.
In the past, I would have gone the easy way and stuck on those plastic numbers that you can find in any craft supply store, but I felt that is would really detract from the look of the hardwood.
I really wanted to engrave the numbers into the clock face, but to be honest, I am not really artistic enough to properly etch the numbers onto the clock's face with my router.
This left me with going with some sort of automated way to etch in the numbers. In the end, I ordered an inexpensive CNC router (which I will talk about in a future post). But while I was doing my research online to figure out what router to get, the internet elves keep showing me this rather small laser engraver as an alternative suggestion.
While I did order a router, I was gradually becoming more intrigued by this little laser engraver that was being pushed on me.
Eventually, I was taken in by a sale price of less than $70 so I figured, what the heck, and pushed the Order Now button.
I guess I had also just proved that that sort of internet marketing really does work...
About a week later a box full of goodness arrived from the far East, albeit a wee bit battered from its journey.
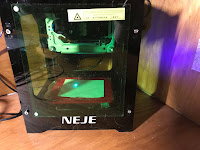
Opening the box presented me with my new prize, a NEJE DK8KZ Laser Engraver.
This particular engraver had a 1000mW Blue Laser (enough to really sting if you have your fingers in the wrong place), and with a working area of about 2-inches X 2-inches.
Granted not a huge area to work with, but enough to be interesting.
With the engraver I also got two USB cables - of which had a headphone style plug at one end to serve as a the power connector, a green Plexiglas shield which is to be used to guard the eyes from any curious onlookers, a rather skimpy instruction book and a sampling of cardboard and plywood to try out on the laser.
Before I got too far into the setup, I did have to stop for a second to have a chuckle at the very bad English translation on the warning label.
I will make sure to follow their advice and avoid the eyes hurt.
After I removed the tape and Styrofoam packaging from the laser's mechanicals, using the engraver basically became a simple plug and play exercise in that I merely needed to plug in the power cord into a 5 Volt USB power source and the USB cord into my PC.
The one drawback that I had was that the laser did not come with its own power transformer.
While USB power sources are pretty easy to find, this laser needed to have a power source that would be able to provide at least 2 amps of power. The majority of USB power sources (such as cell phone chargers) can only provide around 1 Amp of power.,
Luckily I had a 2 Amp power source from a USB hub that I wasn't using, so I was able to get the proper juice to my machine, but the typical user will likely need to head out their local computer store for a suitable source of power.
Once I had everything connected, I downloaded and installed the required software from the website supplied in the instruction book.
After I started the software, the laser connected to my PC and I was ready to do my first etching.
The first thing that I needed to do is to adjust the beam of the laser so that it was as tight of a beam as possible on the engraving surface.
Adjusting the beam is fairly straight forward. I removed the green shield from the engraver and placed the item that I wanted to engrave on the table at the bottom of the engraver.
Once I had the item in place, I was able to see a blue dot on my workpiece. The laser beam was at a low power setting to allow for the adjustment both the beam and the location on where I wanted my engraving to appear on the workpiece.
To adjust the beam, I just needed to turn the adjustment screw on the laser emitter until the dot on the workpiece was as small as possible.
With the mechanical adjustments out of the way, I shifted my focus over to the software that was supplied with the engraver.
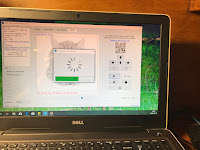
When the program starts it first does a quick system check to make sure that the engraver is connected to the computer and that it's powered on. If the engraver is not present to the PC, the software will attempt to reconnect with the engraver every 15 seconds until it "finds" it. The program will prevent you from going any further until the engraver is connected.
Once the engraver is connected, I was given a pretty simple interface to select what sort of image I wanted to engrave. The two main options were using an image that was built into the software or you could use one of your own images.
As a first test, I started out by using one of the stock images that were supplied by the program. The first thing that I pleased to see that there was the rather large library of images available for use
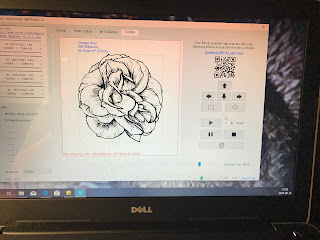
For the purpose of my test, I choose a flower image that looked to be a fairly complex image to produce.
After selecting and sizing the image, the program then gave me several possible imaging options that I could use, with the program defaulting to the image that it feels to be the best option.
Once I settled on the image I wanted, the program then stepped me to another screen where I could add text to the image if I wished.
Finally, I was presented with the screen to start the engraving process.
Again, the controls were fairly straight forward in that I had buttons to start, stop and pause the laser as the main control options.
A key item on this screen was the setting for the burn time of the laser. The key point here is that the burn time needs to be adjusted to reflect the material that you are engraving. The thicker the material, the more time you need to burn. Alternatively, if you want the image to be as darker, you would also need to increase your burn time.
As you would expect, pressing the start button starts up the laser
Occasionally I did hit the pause button to check on progress.
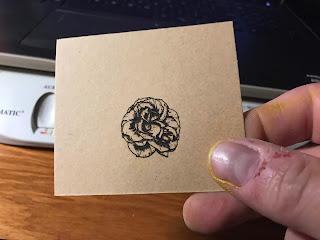
After about 20 minutes, I was presented with a very good quality reproduction of the flower image that I had on my screen.
So I was pretty confident that I can at least use the images that the software gave me, but what about a more real-life example - like an actual photo?
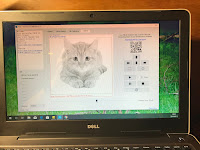
To do that I grabbed a stock photo off the internet and loaded it into the engraving software by dragging and dropping the image into the preview window (which is a bit counter-intuitive for me since I am more used to using a "File Open" approach of selecting my files - something that is not an option with this application) .
Setting up the photo for engraving was pretty much similar to what I needed to do for the stock image that came with the application.
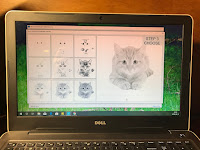
I was particularly pleased with the default rendering that the software suggested engraving.
Once I had things set up I first set the burn time to the maximum amount in order to get a bit of a baseline.
Once I had everything set up, I let it rip.
While the first try looked pretty good in that it certainly looked like a cat, I think it was a tad too dark for my taste.
For my next try, I set the burn time at a significantly lower level.
It was little too light this time.
Picking a setting that was in between the two settings gave me the perfect result.
And so that is the thing with this laser engraver. While set up and operation is quite easy, you do need to tinker with the burn rate in order to get the best result.
While this is not a horrible issue, you may need to waste some of your materials until you get the settings right.
Another thing that I noticed was that some materials won't work very well with this laser. In particular, I found that the laser would not engrave white cardboard, even at the maximum burn time setting.
My suspicion is that white materials tend to reflect the laser beam more, making it less effective.
In the end, I was quite impressed with this little machine. For what I would consider "throwaway" money, I was very impressed with how easy it was to use and how excellent the quality of the images was.










No comments:
Post a Comment