It all started with a rather mysterious message on my answering machine.
When I came home from work a few weeks ago, I noticed the little red light on my answering machine was blinking, indicating that a new message had arrived.
The message was from a gentleman from Ottawa wondering if I was the person that was running a FlightAware receiving station, and if so, would I be interested in helping to track some gliders for an upcoming international soaring competition that would be occurring in my area soon.
Intrigued, I phoned back and after a nice long conversation, I got a quick education on a system that the glider community has been using in Europe for several years and they were very keen on getting firmly established in North America and were wanting to have it in place for the competition,
The underlying goal of this system is safety - in Europe, flying gliders is quite popular which has created situations where several gliders can occupy the same airspace, creating an increased potential of mid-air collisions.
To prevent this from occurring, the glider community had developed an open-sourced based system where gliders are installed with low powered radio beacons that transmitted key information like the glider's location, heading, speed, and altitude. These signals are picked up by land-based receiver stations that report the information to a centralized database in realtime which display the locations of gliders on interactive maps.
This is all managed through the Open Glider Network (OGN) which acts as an online community that provides support, software, and interactive maps for this system.
The good news is that to set up a receiver station, all I needed was a Raspberry Pi, a Software Defined Radio (SDR) receiver and a suitable antenna - basically the same set up as my current FlightAware station.
All I needed to do after that was download the software from the OGN site, do some minor configuration and I was up and running.
To start the build I made a quick online order for the following parts:
- A Raspberry Pi Zero W
- A Micro USB to USB 2.0 Adaptor
- A Docooler SDR Tuner
- An MCX male to SMA female cable adaptor
- A 700Mhz to 2700Mhz antenna (you can also make your own antenna fairly easily)
- An SD card (minimum of 4GB)
- A suitable 5-volt power supply with a micro USB connection
The first thing I did was to go onto the Open Glider Network website and opened the "Downloads" link on the left-hand side of the web page.
On the Downloads page, you are given a number of images that you can use to load up your Raspberry Pi with the necessary software to run an OGN receiver. Once you decide on the image that you want to use, it is simply a matter of downloading the appropriate .tar file from the website. Since I had a Raspberry Pi Zero, I chose to use the image provided by Konstantin Gründger.
Once I downloaded the image file, I opened Etcher on my PC (if you don't have Etcher installed, a link for it is also provided on the Download page of the OGN site), inserted the SD card into my PC and flashed the image to the card.
With the image loaded onto the card, I then put the SD card into the Raspberry Pi and powered it up.
Before I can fully implement the receiving station I first needed to set up a couple of configuration items, namely:
- The name that I would like to be identified as on the OGN network
- My longitude, latitude, and elevation above sea level (Google Maps can provide that for your location)
- Gain and Frequency settings for my SDR receiver
The first thing that I needed to do was to determine what frequency I needed to set my SDR receiver to pick up the glider transponders.
The OGN network utilizes a portion of the GSM frequency spectrum for their transmissions, This is also the same range of frequencies that are used by older cell phones.
While the software that has been preloaded into the Raspberry Pi image is already configured to monitor GSM frequencies, it is unfortunately configured for the European GSM frequencies, and not North America where I am located.
To determine the frequency to use I needed to scan the GSM frequencies in my area to determine the frequencies to monitor.
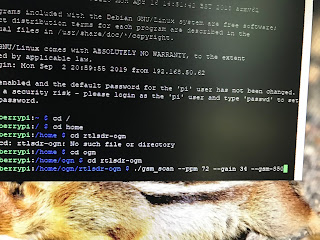
To do this I used the gsm_scan utility that was included with the image and based on a Google search for the GSM allocations in my area, I did a scan with the following parameters:
- ppm (Xtal correction for the receiver) of +72
- a gain of 49.6 (which is the maximum gain setting)
- GSM frequency set to 850
When the utility ran I got a listing of all the GSM signals in my area. I quickly noticed that one frequency, 871 Mhz was particularly strong.
Additionally, the utility recommended that ppm be set to 18.172
Additionally, the utility recommended that ppm be set to 18.172
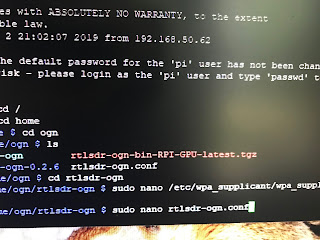
Armed with that information I edited the rtlsdr-ogn.conf file in the home/ogn/rtlsdr-ogn directory using the sudo nano command and made the following changes to the file:
- I set the Frequency correction to 18.172
- Set the CenterFreq to 871
- The gain was set to 49.6 for both the GSM and OGN parameters
Additionally, I set the Latitude, Longitude and Altitude parameters for my location and gave my receiving station an identification name for the OGN network (which in my case is the name of my town).
Now that the software is all set up, the next step was to assemble all the hardware components of the receiver.
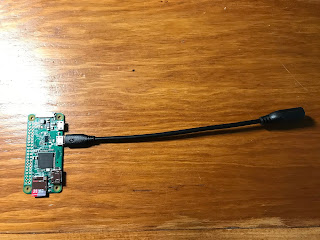
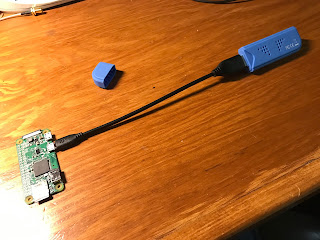
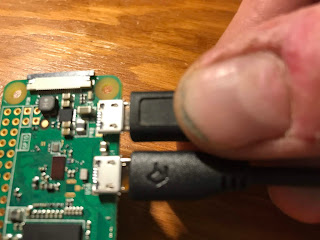
Assembly is really pretty straight forward. First I plugged the Micro USB to USB 2.0 Adaptor into the USB port on the Raspberry Pi Zero (I had to double-check that before I plugged it in since the USB port is located right beside the power port of the Pi - I needed to be careful that I didn't plug it into the power port by mistake).
Next, I plugged the SDR dongle into the other end of the USB adaptor.
I then plugged into the 5-volt power supply into the Pi's power port and finally plugged in the MCX male to SMA female cable adaptor into the antenna port of the SDR dongle.
Next, I installed the antenna in a location that was outside and in an open area since the radio frequencies work via line of sight (so it is important to keep the antenna as far away from nearby buildings and trees). In my particular installation, I installed the antenna at the top of my garden shed.
Inside the shed, I connected the other end of the antenna to the other end MCX male to SMA female cable adaptor and plugged the Raspberry Pi into a power source.
If everything goes well, both the power lights on the Raspberry Pi and on the SDR should light up.
But to really check to see if things are working I needed to go back inside and check my computer.
The OGN software provides a realtime monitoring console which can be accessed by typing in the IP address for the Raspberry Pi with a ":8080" suffix into your web browser.
If the console pops up and is displaying activity, the receiver is on the air and ready to receive gliders.
But the ultimate test was confirmation that I indeed was receiving the gliders during the competition.
I'm pretty excited to know that I am adding to the safety net for glider pilots in my part of the country.
Since this system is just starting to get a toehold in North America, there many areas of Canada and the US that have no coverage at this time - so there is a bit of demand now to get more stations on the air.






No comments:
Post a Comment