Last winter I set up a bird feeder for my Grandmother so that she could watch the birds from her window.
She has enjoyed feeding and watching the birds for as long as I can remember, but in recent years she hadn't really been able to look after the bird feeders herself, so she was very happy to see that I was will to pick up the mantle and continue feeding the birds on her behalf.
One thing that we weren't really happy about was during this past winter, the squirrels also discovered that the bird feeders were an easy way to get a free meal.
While I cannot blame them for raiding my feeders - they need to eat too - they were also chasing away the birds, effectively defeating the purpose of the feeders.
While I do plan on finding a more mutually agreeable (between us and the squirrels) way to feed the squirrels, my main objective was to deter the squirrels from literally stealing the food from the birds' mouths.
Doing a bit of online research presented me with many options for "squirrel-proof" bird feeders (my favorite one has the bottom of the feeder spinning around at high speed, creating one very dizzy squirrel).
The big issue with me was that these feeders tend to be quite expensive, far more money than I was comfortably willing to spend.
I had noticed that one of the feeders had a design that basically had a collapsible tray that fell away from the feeder when something heavier than a bird sat on it. The idea was that the squirrel would fall off the tray whenever they tried to climb on it. When the weight was off the tray, it would then spring back into place on the bottom of the bird feeder, allowing the birds to keep eating
Looking at the concept of this feeder, I realized that I might be able to do the same thing with a little help from some supplies from my local dollar store.
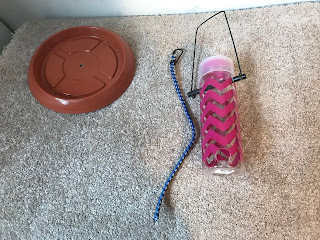
After a quick trip to the store, I had assembled the following items:
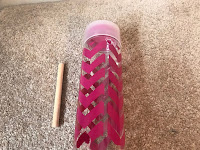
- A large plastic water bottle
- A 10 inch plastic saucer that you would use for sitting a flower pot into (these are used to water the plant)
- A length of bungee cord (I got a tube of about 10 of them)
- A 1/4 inch diameter length of dowel
- A wire coat hanger
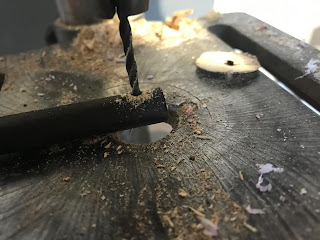
I first started the build by drilling two 1/2 inch holes into the bottom of the water bottle. These holes will serve as the openings for the seed to flow out of the bottle and onto the seed tray underneath.
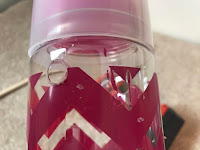
Next, I drilled two 1/4 inch holes near the top of the water bottle, just below the lid of the water bottle. These holes will be used to hold the dowel which I will be installing later on.
Next, I inserted the 1/4 inch dowel into the openings in the top so that I had about one inch of dowel poking through one side of the water bottle.
I then made a mark on the dowel one inch out from the other side of the water bottle.
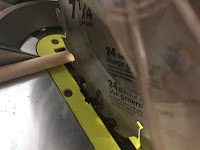
I removed the dowel and cut the dowel at the mark that I made with a saw.
This gave me a piece of dowel that was 2 inches longer than the width of the water bottle.
I then gave the dowel a quick coat of paint to protect it from the elements.
Once the paint had dried, I then drilled two 1/8 inch holes 1/2 inch in from each end of the dowel.
Shifting back to the water bottle again, I then drilled a 3/8 hole into the bottom of the bottle, making sure that I drilled the hole as close to the center as possible.
The purpose of this hole will be to feed through the bungee cord in order to secure the saucer to the water bottle.
With all the holes drilled, I then reinstalled the dowel back into the holes at the top of the water bottle.
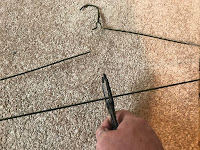
Taking the wire coat hanger, I cut the hanger roughly in half with some wire snips and bent the wire into a "U" shape, making sure that the sides of the "U" were the same length.
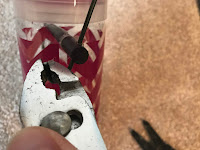
I then inserted the ends of the wire hanger into the holes that I just drilled into the dowel and bent the wire ends over with pliers so the wire was wrapped around the outside of the dowel, securing the wire hanger in place.
I then took the plastic saucer and drilled a 3/8 inch hole into the center of it to allow for the bungee cord to pass through.
I then drilled a few 1/8 inch holes along the outside of the saucer to allow for drainage of water whenever it rained.
The next step was to join the saucer and the water bottle together in order to make the completed bird feeder.
First I gathered together the water bottle (with the wire hanger and dowel installed), the plastic saucer and a length of bungee cord.
The bungee cord had 2 metal hooks installed on each end of the cord. I removed the metal hook from one end of the cord with a pair of scissors and wrapped the cut end with some electrical tape.
I then fed the cut end through the bottom hole of the water bottle such that the end of the bungee cord that still had the metal hook on the end was at the top end of the water bottle.
With the cord fed through the bottom hole of the bottle, I then hooked the other end of the cord to the dowel at the top of the bottle with the metal hook on the cord.
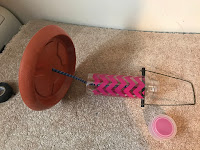
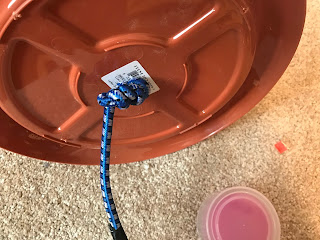
Next, I feed the end of the bungee cord through the hole that I drilled into the center of the plastic saucer and pulled the cord through until the saucer fitted snugly against the bottom of the water bottle.
To finish off the construction of the bird feeder I then tied a couple of knots in the bungee cord such that the knot was snug against the bottom of the saucer.
I then snipped off the excess bungee cord.
The only thing left to do was fill the bottle up with some birdseed and hang it up outside.
I've had the feeder out for about 6 months now and I have seen nary a squirrel attacking it.
There are a could of things that I would do differently the next time that I make one of these.
The first thing I would do is that I would make the holes at the bottom of the water bottle a bit smaller. One thing that I have noticed is that more seed than I would like comes out of the holes at any given time. This means that a fair amount of seed gets wasted. While this has been good for the family of skunks that come by every night to clean the spilled seeds off the ground, it also means that I need to by birdseed more often.
The other thing is that I might consider using a bungee cord with more resistance. While lighter birds like sparrows and finches have no trouble using the feeder, heavier birds like mourning doves do tend to trigger the saucer to collapse.
All in all though, not bad for about 5 dollars worth of materials.
















No comments:
Post a Comment