In my last post, I had just acquired an engine for my tractor, thanks to an old lawn mower that I managed to score to free.
Now that I had my engine, it was time to install it in my tractor.
I started the process by setting the engine on top of the tractor's chassis. The idea was to position the engine as close to the front of the tractor as possible.
However, as the plans had indicated that the engine was to be surrounded by a hood, including a front grill and a dashboard, I also needed to make sure that the engine was not too far ahead, which would prevent proper air circulation around the engine.
I determined that having the engine about six inches away from the front grill of the tractor would be the optimal location for it.
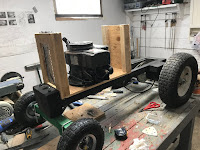
Using a piece of plywood as a template for the front grill, I did a test fit of the engine on the chassis in order to make sure that the drive shaft of the engine did not interfere with any of the chassis components.
Satisfied with the proposed location for the engine I then measured the diameter of the bottom of the engine in order to determine what width I needed to make my engine mount. For the particular engine, the bottom had a diameter of 9 inches.
Based on that measurement, I needed to make the entire engine enclosure to a width of 9 inches.
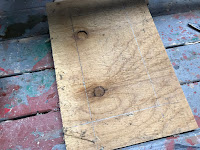
I first started the enclosure by building the front grill. Taking a 1/2 inch sheet of plywood, I cut out a 9 inch wide and 2-foot long sheet.
In order to promote airflow for engine cooling, I also needed to have an opening cut into the front grill to allow air to flow into the engine while the tractor was moving forward.
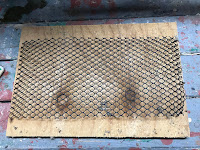
I had on hand some plastic mesh that was about a foot wide that I figured would be perfect.
I cut out a 2-foot long section of the mesh and using it as a template, I measured out an opening in the center of the plywood, making the opening about 8 inches wide and about a foot long so that the mesh would overlap the opening, making it easier to attach the mesh to the grill.
Once things were marked out, I then cut out the opening.
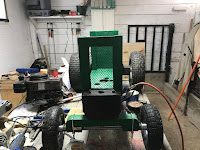
I then installed the front grill to the chassis of the tractor by screwing it into the front axle support.
Next, I cut another 9 inches wide and 2 feet long piece of plywood and I mounted it directly on top of the chassis just behind the front grill and I secured it to the chassis with wood screws.
This sheet will serve as the physical engine mount for the tractor.
When looking at the original plans for the tractor, I noticed that the front grill and the back dashboard served as the mounting points for the steering gear for the tractor.
Steering the tractor would put a lot of stress on the mounting points for the steering gear. I was a bit afraid that the plywood sheets would not be totally up to the job.
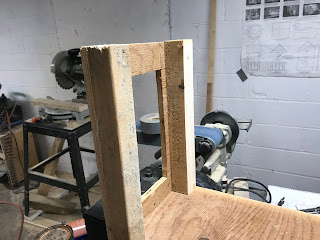
As added reinforcement, I attached two 18 inch strips of 2 X 2 pine on the inside edges of the front grill in order to provide that extra reinforcement.
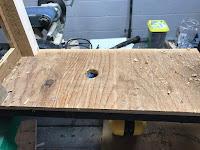
Next, I positioned the engine on top of the engine mount and marked the location on the plywood on where the engine's driveshaft would be located
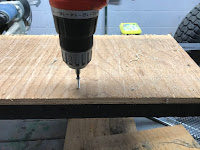
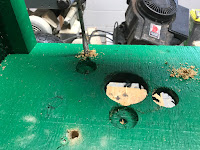
At that location, I then drilled a 1-1/8 inch hole through the motor mount.
Remounting the engine on top of the mount so that the driveshaft was inserted through the hole that I had just drilled, I notice a couple issues.
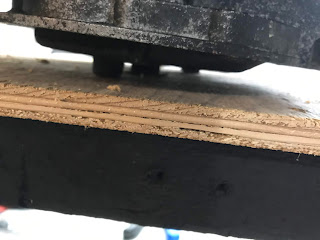
The first thing that I noticed was that there were a few obstructions underneath the engine that was preventing the engine from sitting flush on top of the engine mount.
The second issue that I noticed happened when I tried to do a test fit of the steering gear.
The steering for the tractor would prevent me from accessing the gas tank if I left the engine in its current position.
To resolve the gas tank issue, I rotated the engine 90 degrees so that the gas tank was now located on the right side of the tractor.
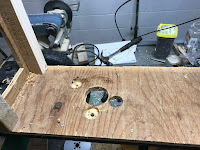
To resolve the obstruction issue on the bottom of the engine I marked the locations of the obstructions on the plywood and drilled a couple of 1-inch holes at those spots.
A retest of mounting the engine now had everything sitting flat. I also made sure that the driveshaft was also easily accessible underneath the engine mount.
Next, I cut out another 9 inches wide and 2 feet long piece of plywood for the back dashboard for the engine compartment and I secured it to the back of the engine mount with wood screws.
Likewise, I also attached a couple of 2X2 strips to the back dashboard to provide extra reinforcement for the steering gear.
Now that the bulk of the structure was in place, I figured that this was a good time to give things a nice paint job.
After the paint had dried, I then attached the plastic mesh to the front grill with some staples.
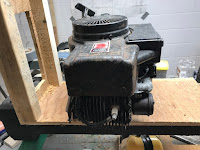
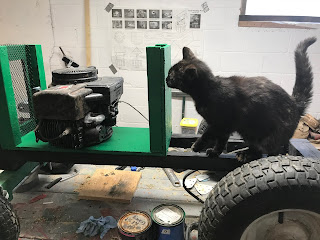
I placed the engine back on top of the mount and positioned it in the final position that I wanted it mounted on the tractor.
Of course, I did need some assistance from one of the shop supervisors.
Once the engine was in the correct position, I then marked the locations for the three mounting holes on the engine that was originally used to mount the engine to the mower deck onto the plywood of the engine mount.
I then drill a 1/2 inch hole at each of the marked locations.
Using some 3 inches long 1/2 inch diameter bolts I then permanently secured the engine to the tractor.
To finish the engine compartment I then took two 18 inches long pieces of 2X2 and I attached them at the top of the compartment, connecting the front grill and the dashboard together.
Of course, I needed to paint them in an appropriate color too.
Finally, it's starting to look a little like a garden tractor.
The next area of focus will be to try and get the engine to drive the wheels.
This may prove interesting.













No comments:
Post a Comment