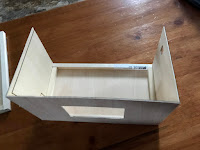
Once again I turn my attention to my Raspberry Pi radio scanner. Now that I was happy with my electronic solution, I now needed to figure out how I can house my creation as something that looked fairly attractive.
I did have a 2-watt laser engraver that up to now I've been using to engrave some wooden signs, but the manufacturer of my engrave also claimed that it could also be used as a cutter that can be used to make parts out of thin materials.
I always wanted to give that a try and I figured that building a cabinet for my scanner would be the perfect first project to try this out.
Based on the literature that was provided with my lase, it was claimed that I should be able to cut through 1/32 inch thick plywood. With that bit of information, I immediately ordered a few 12"X12" sheets from Amazon
I decided to build the cabinet as simply as possible - basically just a box with an opening in the front to accommodate the screen for the Raspberry Pi, openings in the back to allow for ventilation and power connections, two openings at the top for the speaker and antenna and an opening on the side of the cabinet to allow for a USB connection for access to the Raspberry Pi for configuration and upgrades.
To allow space for all the USB connections to the Raspberry Pi I settled on a cabinet that was 9 inches wide, 5 inches tall, and 5 inches deep.
For the screen, I needed an opening that was 3.75 inches wide and 2.25 inches tall
In order for the laser to know where to cut, I needed to somehow create the necessary instructions using GCODE (the exact same code that I use for my CNC Router). While I could use the Candle program to create the necessary code, I did want to take a look at what else was out there for design software.
Poking around some online forums, I kept reading about how a lot of people were using Inkscape as a design tool for CNC and laser work. Even better Inkscape was free to use.
I won't go into any in-depth review of Inkscape - there is a very healthy online community for the tool that would do a much better job than I would ever be able to. However, after some playing around, I was able to layout the sides of the cabinet in Inkster with the necessary openings that I needed and exported them out to GCODE files.
As an extra touch, I also laid out a 1.5"X1.5" speaker grill to cover the speaker's opening in the cabinet.
 |
| Speaker Grill |
 |
| Cabinet Sides |
 |
| Back, top, and bottom of the cabinet |
 |
| Cabinet Front |
I next transferred the GCODE to my laser engraver and set it to cutting mode and let it rip.
On the whole, I wished I had a stronger laser. While the 2-watt laser on my engraver did make accurate and fairly deep cuts into the plywood, it could not cut all the way through the wood, even after several passes with the laser. This required me to finish the job with an Exacto knife to completely remove the parts. While this wasn't really a big deal, I did start to think it was time to start saving my nickels for an upgrade to a 5-watt laser.
Regardless, I did have all the parts for the cabinet cut out and ready for assembly
To add some strength to the cabinet, I decided to line the outside edges of the top and bottom of the cabinet with some 1/2 inch square doweling, I cut the dowels to the correct lengths and glued the dowels along the outside edges of the cabinet top and bottom
Once the glue was dried, I proceeded to assemble the cabinet by applying glue to the outside edges of the dowels and attaching the sides, top, and bottom of the cabinet to the dowels. To hold things in place until the glue dried, I used a little bit of painter's tape.
I deliberately keep the back of the cabinet unattached to allow for the installation of the internal parts of the scanner. The back will be glued in place once everything is installed.
Once the cabinet was assembled, I then attached the speaker grill to the top of the cabinet over the hole that I had made for the speaker, holding it in place with some glue.
Finally, with a few coats of varnish, the cabinet for the scanner was finished.
The next step is to do the final install.


No comments:
Post a Comment