I'm not sure how I arrived at the notion that I needed this thing.
I suppose it really stemmed from the fact that I needed a new "For Sale" sign for the collection on wooden wonders that I had sitting on my front lawn.
In the past, I had used one of those cheap plastic signs that you can pick up at the hardware store for a few dollars, but the one that I had been using blew away in a wind storm recently.
While the old sign did serve its purpose, I have been wanting to class things up a bit and have my sign be more in keeping with what I was selling.
Now, there are a few ways to make a sign out of wood.
The easiest way is to just slap some paint on a wood board, but let's be honest, my free hand lettering abilities leave much to be desired.
Alternatively, I could also cut in the letters freehand with my Dremel Trio, which is something I had done before and was seriously considering before a chance encounter with an ad that popped up on Facebook one day (I swear Facebook has some sort of app that reads your thoughts).
The ad was for a small CNC router that could be bought for only a couple hundred dollars. Previously, I had always assumed that CNC routers that were large hulking things that could only be bought for the few thousand dollars, so seeing one for a tiny fraction of that leaped out at me.
I assumed that since it was so cheap, that it would be basically junk, but when I did some further investigation, I found out that this router belonged to the 3018 families of CNC routers. The main reason why they were so cheap was that they used the Arduino and open source software for its brains and there was a very active online community that supported it.
So, I took a chance and bought one. The way I figured, it would be a good way to learn about using a CNC machine, and if it was something I got really into, it would give me a stepping stone to one of those expensive monsters,
A few weeks later a box arrived containing a collection of parts (to be fair, it was listed as a kit)
After some initial confusion - chiefly because the instruction had no relation to the parts that I had sitting in front of me (a quick download from the support site put me on the right path) - I assembled the router and had it talking to my computer with little fuss.
I'll spare you the details on how I assembled it - there are a lot of sites and videos out there that do a far better job than I could 😊.
The router executes instructions that are written in a programming language called g-code.
In a nutshell, g-code is a language that tells computerized machine tools how to make something. The "how" is defined by g-code instructions provided to a machine's brains to tell the motors where to move, how fast to move, what path to follow and so on. This programming language is often used to operate 3D printers, laser engravers, and of course CNC machines like my router.
My router came with an application called GRBL that is used to interface the router to my PC and to send g-code instructions to it. While the application seems to be pretty easy to use in that I can easily manually control the router and it can easily run prepackaged g-code programs, the application doesn't seem to have a very user-friendly way to design new projects.
Since I didn't really want to get into hand-coding g-code programs to make my projects, I really wanted something that I could draw on my PC screen and have my PC convert them into g-code.
After some research on-line, I settled on the Easel tool that had by developed by Inventables. As a web-based application, Easel had a very easy design interface with the ability to simulate the actions of the router on your screen in order to give me a really good idea of what my finished project would look like when it was engraved into my wood workpiece.
As a nice first project, I wanted to create an address number sign for my house since I had recently gotten a polite note from my post office saying that I needed to have my house number displayed at my mailbox.
To create the sign I first logged onto the Inventables site and created a free account in order to gain access to the Easel application.
Once I set up my account and clicked on the link to Easel, I was first presented with a blank workspace that was split into 2 screens.
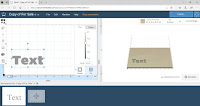
On the left screen was a design template that had a working surface mapped out in a grid line with a selection of drawing tools available in a toolbar on the left-hand side.
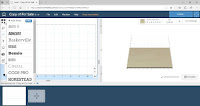
Since this will be a very simple sign, I started by clicking on the text tool from the toolbar, which presented me with a list of possible font styles that I could use for my sign.
When I selected a font that I liked, Easel then placed a text box with the word "TEXT" in my selected font on the workspace.
On the right-hand side of the screen, Easel provides a sample of what my text would look like once it was engraved onto the wood.
To change the contents of my text I clicked on the word "Text" in order to activate an edit box for the text. In addition to allowing me to change the text, the edit box will also allow me to reposition and resize the text.
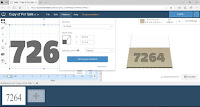
I replaced the word "TEXT" with my house number and using my mouse I moved and resized the text and centered it on the wood on the right side of the screen.
Once I had the text for my sign set to the right size and position, I next set the depth of cut for the letters of my sign.
While the letters of the sign were still highlighted in my workspace on the left side of the screen, Easel has a pop-up menu on the right side of the workspace that allows you to set the cut with a slider.
In my example, I set the depth of my cut to about 3/8 of an inch.
Once the depth was set I then selected the size and type of wood that I would be using.
Along the top of the picture of my simulated workpiece on the right-hand side of the screen, there is a box that indicates the size and type of wood of your workpiece.
Clicking on this box opened up a pop-up menu while allows you to set the size of your workpiece and the type of material it is. In my case I set my workpiece to be 11 inches long, 7 inches wide, 0.5 inch deep and I indicated that I was using birch plywood as my material.
Before I got too much further along, I figured that I should take a moment and give my project a name. In Easel, your projects are automatically saved online so you can always close your web browser and be certain that your work in progress will still be there when you log onto Easel again.
The issue is that Easel gives your projects a name of "Untitled" by default. As a good practice, I always give my projects a name. To do that I need to Rename my project by selecting the File menu from the top of the screen and selecting the Rename option.
This pops up a menu box that then allows me to give my project a more appropriate name.
I could use Easel to drive my CNC router, however, the router is located in a place in does not have any internet access. Since Easel is a web-based application, this means that I need to create the necessary g-code so that I can run the CNC machine offline.
.
To export g-code from Easel, I first selected the Machine menu option from the top of the screen,
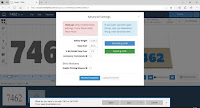
This pops up a menu that allows you to set up your CNC router and start engraving your project through the Easel interface. However, in order to export g-code, I needed to click on the Advanced link at the bottom of the pop-up box.
This sends me to a new pop up menu that had an option to Generate g-code.
Clicking that option creates the g-code for my project, and I'm next provided with a button to Export my program.
Clicking that button saved the generated g-code to my download directory which I then copied to a flash drive and transferred the file to the computer in the shop that was running the router.
Once I was back in the shop, I cut out a 6 inch by 11-inch piece of .5 inch plywood
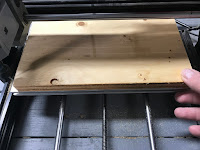
I placed the plywood on the cutting table of the router. In order to make sure that the wood stayed securely in place, I needed to clamp the wood to the table. The router did come with some fairly rudimentary clamps but I wasn't really fond of using them.
Instead, I got some small C clamps from the craft store that are normally used to hold plastic model pieces in place while being glued.
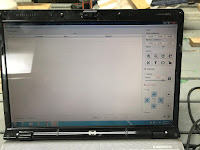
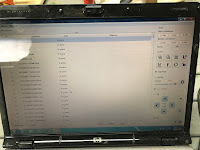
Once the wood was secure I loaded up the GRBL program on my PC and I loaded in my g-code program from my flash drive.
Easel always assumes that your router always starts its cuts from the bottom left-hand corner of your workpiece. Using the control panel on GRBL I manually moved my router bit so that it was located at the bottom left corner of the plywood.
In order to ensure that the cutting depth was correct, I position the router bit so that the bottom of the bit was at the same height as the surface of the plywood. When the g-code program starts executing, the program raises the bit a little before the router moves the bit to the first cutting position.
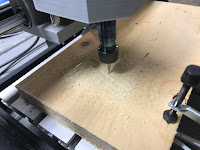
Once I was satisfied that the wood was nice and secure and that the router bit was in the correct starting position, I hit the Send button on the GRBL console and the router came to life.
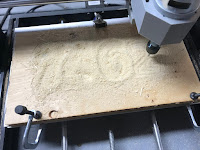
Little by little, my sign started to appear in front of my eyes.
After about an hour of cutting, my new number sign was ready. The next step will be to paint the numbers and build a bit of a frame for mounting it to my mailbox,













No comments:
Post a Comment