After a couple of weeks of construction, I was finally at the point now where I can finally put everything together and give my CNC router a decent home.
The first order of business was too pretty up the enclosure up a little. While the enclosure is going to be serving a purely utilitarian purpose, I really wanted to make it look as attractive as possible since it will be sitting out in the open on my workbench.
To accomplish that, I decided to give the entire closure a couple of coats of black paint (though any color would have been fine - I just happen to have a lot of black paint on hand).
While the paint was drying, I thought a little bit about how to further reduce the vibration while the CNC worked inside the enclosure.
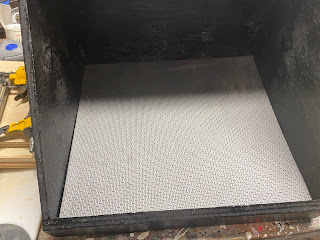
Over the winter, one of my projects was doing a bit of a revamp of my boat. This entailed the installation of some rubberized flooring into the bottom of the boat. This was fairly thick stuff and I just happened to have some leftover from that project - perfect material for cutting down the vibration.
Since the bulk of the vibration will be coming from the bottom of the router, I figured that lining the bottom of the enclosure with the flooring would be a good idea.
Next, I focussed on the enclosure lid and installed the plexiglass window into the top of the lid with the help of some contact cement and I installed a handle into the front of the lid by drilling holes in the middle of the lid and attaching it with screws.
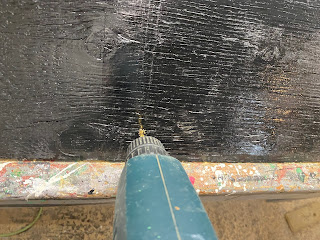
Turning to the back of the enclosure, I test-fitted the exhaust fan grill over the opening that I had cut out earlier and marked out the locations for the mounting screws on the enclosure back. Using a 1/8 inch drill bit, I then drilled holes at those locations.
After that, I drilled a couple of 5/8 inch holes near the top of the right-hand side of the enclosure to allow access for power to the CNC and the exhaust fan.
Next on the list was to wire up and install the fan.
When I was rooting through my junk drawer recently, I came across a 12 volt LED light bar that I figured would be a nice way to making things easier to see when looking through the viewing port.
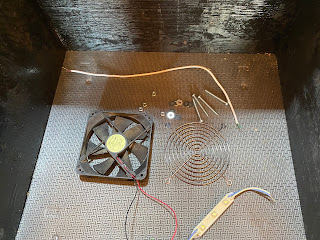
Along with that I also collected the fan and grill, some 2 inch long bolts with nuts and washers, a power connector and some hookup wire,
First I attached the fan to the power connector and installed the fan and grill into the enclosure using the nuts and bolts. Before installing the fan I first powered it on to make sure that I installed it so that the fan was blowing into the enclosure to provide positive pressure inside the enclosure to keep the sawdust inside.
Next, I cut off a length of hook-up wire and hooked up one end into the power connector, and hooked up the other end to the LED bar to give it a quick test.
Satisfied that all the electrical bits were hooked up correctly, I buttoned things up a bit by installing the power connector for the fan and lights into the top hole in the side of the enclosure and secured it in place with contact cement.
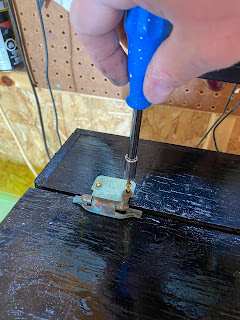
After that, I installed the lid to the base of the enclosure by installing 2 cabinet hinges to the lid and to the top of the enclosure.
With the lid installed, I attached the LED bar to the inside of the lid with a couple of screws and soldered the LED to the hook-up wire.
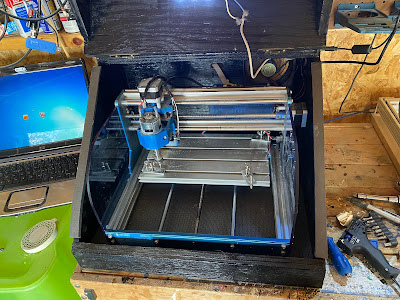
The final step was to actually install the CNC into the enclosure.
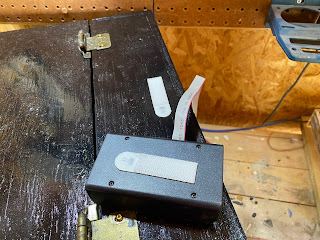
I inserted the CNC into the enclosure, fed through the power cord for the CNC through the enclosure side, hooked it up to the CNC, and fed the ribbon cable for the off-line controller through the slot in the back.
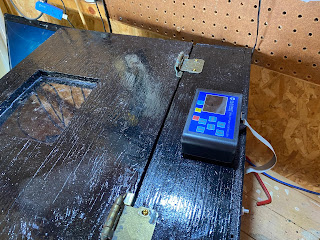
Taking the controller module, I then attached it to the top of the enclosure with some velcro tape.
With the last piece, it was read to try it out. I looked up a piece of wood into the router, turned on the router, plugged in the fan and light, loaded up a program, and gave it a whirl.
Immediately I could tell that the noise was greatly reduced and with the LED light, I could easily see how the work progressed through the viewing window.
The amount of airborne dust from the router was also greatly reduced, which means that everything in my shed will no longer be covered in a fine layer of sawdust.










No comments:
Post a Comment