Last week, I talked about my neverending frustration in keeping the blades on my surface planer nice and sharp, which was creating a situation where my favorite tool was quickly becoming my most hated tool.
After searching in vain for an off-the-shelf sharpener, I quickly came to the realization that I needed to make my own tool if I ever wanted to sharpen my knives. Thankfully, I found out online that many people had the same issue that I had, and I was able to find many tutorials on how to build a jig that should make sharpening knives quick and easy.
I found that everyone had their own special approach to building their jigs, all with varying degrees of complexity. Most jigs were designed so that they would be able to handle a variety of different-sized planer knives, so often they had built-in locking features that locked the knives in place as you sharpened them.
In my own particular case, I am always going to use the same size knife in my planer, so I didn't really need to have a jig that needed to accommodate different blade types, which meant that my jig should be fairly simple to build.
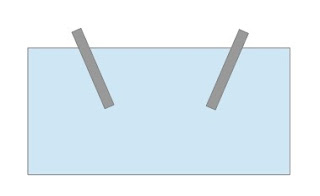
My plan was to build a jig using a block of scrap wood that was the length of my planer knives. In the block, I would cut 2 slots into the face of the block that would be cut at the same angle that the bevel of the planer knives is set at.
I would finish off the jig by capping the ends of the block with 2 small hardwood end pieces, which would hold the knives in place while I sharpened them.
To start building the jig, I first took a length of 2 X 4 scrap lumber that was a little bit longer than my planer knife.
Looking up the spec for my planer, I saw that it took planer knives that had a 30-degree bevel on the edge of the blade. To properly sharpen the knives, I needed to have the knives sitting in the wood at a 30-degree angle so as to have the bevel edges of the knives be parallel to the face of the woodblock
To do this I needed to cut two 30 degree grooves into the block, with the grooves pointing out away from each other.
Additionally, I wanted to have the knives stick out about an eighth of an inch from the surface of the block.
To do this I first went to my table saw and set the blade angle to 30 degrees.
Since my planer knives were .75 inches wide, and I wanted to have an eighth of an inch of the blade sticking above the wood, I needed to set my blade height to a half-inch.
Once that was done, I then set the fence of the table saw to be about an inch away from the blade.
I then ran the 2 X 4 two times along the saw blade, rotating the block after the first pass, which gave me the 2 outward-pointing grooves that I wanted.
A quick test fit of the planer knives confirmed that the knives fitted okay into the groove and I checked to confirm that the bevel of the knife edges was parallel to the top of the block.
The next step was to shorten the block so that it was the same length as the planer blades. I inserted a planer blade into one of the grooves in the block and I marked the end of the planer knife on the block.
Using my miter saw I trimmed the block to that length.
The next step was to add the end caps to the jig, which will keep the knives in place while they are being sharpened.
For the end caps, I used a piece of 2-inch wide scrap maple
I cut the maple strip so that I had 2 pieces that were the same length as the width of the block and attached the maple pieces to the ends of the block with wood glue and brad nails. When attaching the maple end caps, I made sure that when the planer knives are sitting in the groove that the top of the knives is level to the top of the end caps.
That basically finished the build for the jig.
Time to test it out.
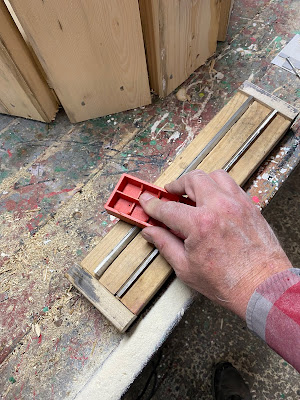
To sharpen the knives, I installed the knives into the jig by inserting them into the slots in the jig, making sure that the blade points of the knives were pointing outward.
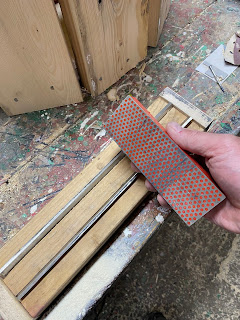
Taking a fine grit, slightly dampened whetstone, I ran the whetstone lengthwise a few times along the length of the planer knives.
Once I did a couple of passes, I then removed the knives from the jig and ran the whetstone along the back of the knife blades to remove any burrs from the sharpening process.
A close inspection of the end result showed a very noticeable improvement in the quality of the knife edge.
The real proof in the pudding was how they would work in the planer.
After installing the sharpened knives into the planer, I ran a test piece of wood through it. My old friend was happy once again as it spat out a nicely finished piece of wood with little complaint.
So now I have finally mastered the dark art of planer knife refinishing. I still can't believe how simple the solution turned out to be!


No comments:
Post a Comment