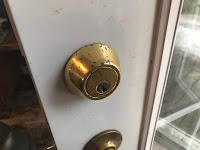
Recently the deadbolt on my back door gave up the ghost.
One of the pet peeves that I had about my old deadbolt was that that it was the old school type that required a key in order to gain access to the house from the outside.
While that is basically the purpose of a deadbolt, I had found it a bit annoying whenever I found myself in the backyard after mowing the yard, trying to get into the house only to find the back door locked. After a fair bit of pounding on the door and yelling, one of the other occupants of my home would eventually amble down to let me in.
Granted it was a very minor problem, but it did bug me.
So with the demise of the old deadbolt, I figured that this would be a perfect opportunity to find a way to eliminate my pet peeve but still maintain the security of my home.
At my local hardware store, I had noticed that they had deadbolts that could be unlocked by entering a user-defined code on a keypad. The particular deadbolt that I was looking at also was on sale for a decent price.
Excited about trying out this marvel of security, I grabbed a box and headed back home.
Once I got home I immediately opened the box and dumped out the contents.
Inside were all the necessary gear to install the deadbolt into a new door, including the electronic module (for both the inside and outside of the door), the deadbolt assembly, mounting hardware including strike plates for the door jamb, spare keys in case the battery fails, and most importantly, instructions
Since I will be replacing an existing deadbolt, I would be able to reuse some of the existing hardware from the old deadbolt - mainly the strike plate hardware.
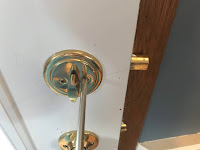
The first order of business was removing the old deadbolt from the door.
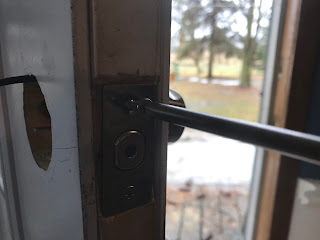
For the most part, it is a pretty simple matter of removing the two screws holding the lock in place and removing the lock assembly from the door.
After that, the old deadbolt assembly was removed by removing the screws holding the strike plate to the door and pulling the deadbolt out of the door
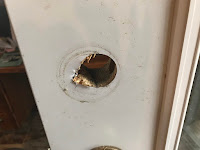
At this point, I had a bit of a hole in my door. If I was lucky, the hole should be the right size, in which case this becomes a relatively simple matter of putting in the new deadbolt and installing the locking mechanism.
In order to confirm this, I cut out the hole template that was provided with the instruction sheet for the new deadbolt and gave it a quick test fit over the hole in the door.
Of course, the hole was too small.
So I needed to enlarge an existing hole.
If this was a new door where I needed to create a new hole for the lock, this would have been pretty straightforward - All I needed to do was to find a hole saw bit that was the same size as the hole template, mark the center of the hole on the door with the template and just drill a hole with my cordless drill.
Since I was dealing with an existing hole, using a hole saw was pretty much impossible. I needed to get a little creative.
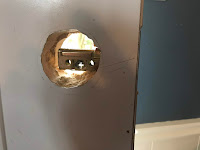
I placed the cutout template such that it was centered on the hole and traced the template outline onto the door.
I next took my Dremel Trio (any small rotary tool would work too) and I carefully trimmed the hole in the door so that it was the size of the template.
Once I cut the hole to size, I gave the locking mechanism a quick test fit to make sure that the hole was big enough.
Likewise, I did a test fit of the deadbolt into the door to make sure that it was aligned correctly to the locking mechanism.
Once I was certain that the deadbolt was correctly aligned, I then permanently installed the deadbolt mechanism by screwing the old strike plate back in place into the door.
Next, I installed the interior mounting plate for the locking mechanism by securing it to the outside portion of the locking mechanism with 2 screws.
This was the point when I found the first issue.
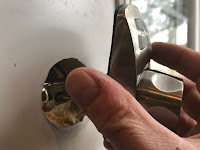
When I tried to install the interior part of the locking mechanism to the mounting plate, I discovered that I had cut my hole in the door a little too large, leaving a small gap on the right-hand side of the locking mechanism.
While a small thing, I was a bit annoyed at my carelessness and I really didn't want to be reminded of my sloppy workmanship each I opened my back door.
Some cosmetic surgery was in order.
To cover up my little boo-boo, I decided to create a small cover plate to go between the lock mechanism and the door.
I made the cover plate out of some 1/8 inch birch plywood that I had.
I first traced out the shape of the locking mechanism onto the plywood.
With the shape traced out, I then marked the shape of the outline out 1 inch from the original tracing so that I had the shape of the lock mechanism, only a little bigger.
I also took this time to drill out a hole to allow the lock mechanism to connect to the deadbolt inside the door
I then cut out the larger shape with the scroll saw.
/
With a quick sanding, I now had a cover plate that was the same shape as the inside locking mechanism. To finish it off, I gave the plate a quick coat of paint.
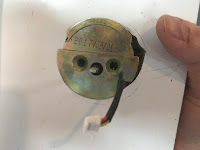
With the cover plate built, I then continued to install the deadbolt by installing the batteries into the inside locking mechanism, installed the cover plate that I just made, connected the inside locking mechanism's power supply to the outside keypad and attached the inside locking mechanism to the door with the supplied screws.
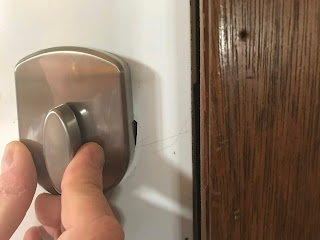
At this point, the only thing to do is program the lock with a key code of your choice, give it a quick test and the install is complete
I've been using this deadbolt for the last few months and so far it's been working as well as I had hoped. It has certainly been a nice luxury to just simply punch in a code and I'm in from the cold.












No comments:
Post a Comment