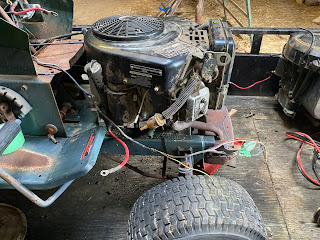
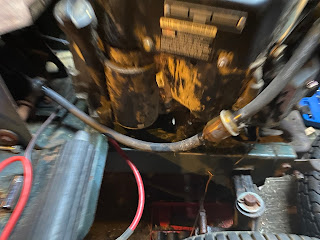
In my last post, I just successfully removed the old engine from my basket case garden tractor, which left a fairly large empty space in my tractor's front. While that made the tractor a possible candidate as a soapbox racer, I really needed to replace it with another engine.
In my previous post, I mentioned that I actually had a spare engine sitting around that I had rescued from another lawn tractor that was on the way to the junkyard. This engine was also a twin-cylinder engine, similar to the engine that I had just pulled out of the tractor, but since it was a bit newer, had some more modern features.
The new engine was a Briggs and Stratton Vanguard 2 cylinder "V twin" engine that was made in the early 2000s. The nice thing about this engine was that it had an oil filter, which made maintenance a bit easier, and with the V twin design of the engine, the engine would run a lot smoother than the original in-line engine that the tractor had.
I did have some initial concerns as to whether I would need to drill some holes into the tractor so that I would be able to mount the engine to the tractor, but after comparing the mounting locations on the old engine to the replacement, plus a quick test fit of the new engine on the tractor frame, I was quite relieved that the new engine would easily attach to the tractor using the existing engine mounts. I'm not sure if this is some sort of standard that Briggs has with their engines, but it was nice to see that the engine should more or less be a plug-and-play affair.
To start the install I first bolted on the drive pulley from the old engine onto the drive shaft of the new engine. Once again my luck seemed to hold since the drive shaft of the new engine was the same diameter as the old engine, so installing the pully was a simple matter of slipping it over the driveshaft and bolting it in place.
Next, I mounted the engine onto the tractor frame, making sure to first slip the drive belt onto to drive pully while I was placing the engine. Once everything was in place, I aligned the engine to the mounting holes in the frame and attached the engine with four bolts.
The next step in the process was to hook up the controls for the choke and the throttle. My luck still held in that the installation was still very much a plug-and-play affair since I was able to directly connect the original throttle and choke cables directly to the throttle and choke on the engine.
The cables on the tractor had a "z" design on the ends which fed and locked into a hole that was on the engine controls.
I did have a bit of a challenge with the throttle cable since it was tucked in behind the air filter box for the engine, However, after removing a few screws I was able to detach the air box, making installing the cable to the throttle a lot easier.
With the controls hooked up, the next step was to hook up the fuel system. Since both the fuel line on the tractor and the engine were both a bit old and definitely had lost a lot of their flexibility, I determined that it would probably be a good idea to replace the fuel line with a new one. Luckily fuel line is pretty cheap at my local farm supply store, so I took a section of the old line for size comparison and came home with a few feet of line - more than enough to plumb the fuel system for the tractor,
Cutting the line to the length that I needed, I connected the line from the fuel tank to the fuel filter, with a shorter length going from the filter to the engine's fuel pump.
I secured the fuel line in place by reusing the hose clamps that were used on the old fuel lines.
With the fuel system hooked up, the only remaining thing to do was to hook up the electrical connections for the engine.
The wiring on the tractor was quite old and chock-full of safety switches which may or may not be working. To be honest, I didn't trust any of the electrical wirings for this tractor, so my plan is to strip out the wiring and replace it with something a lot simpler, and easier to maintain.
That will be a bit of a project in itself, but in the meantime, I should at least see if the engine I installed would actually work.
The electrical connections of the Vanguard engine are actually pretty simple. There is a ground strap that is connected to the negative terminal of a 12-volt battery. There is a terminal on the engine's started that cranks the engine when it's connected to the positive terminal of the battery,
The trick with this particular engine is how to keep it running once started, and how to shut it off when you are done using it.
More small engines have a kill mechanism that grounds out the magneto on the flywheel, killing power to the spark plug, shutting down the engine.
In the case of the Vanguard engine that's now installed in the tractor, the kill switch is instead a solenoid that's installed in the float bowl of the carburetor. When power is applied to the solenoid by connecting it to the positive terminal of the battery, the solenoid opens up and allows fuel to enter the carburetor. When power is removed from the solenoid, it shuts off the fuel supply, killing the engine.
Armed with this knowledge, I connected the negative terminal of a 12-volt battery to a grounding point on the engine and connected the power wire from the fuel solenoid to the positive terminal of the battery - which produced a reassuring click from the solenoid.
After that, I gave the engine some choke, touched the positive post of the starter to the battery and the engine came to life.
Now that I am reassured that I have a working engine now installed in the tractor, the next issue to tackle is to get a working electrical system.


I see that you swapped out an oppy (opposed twin) with a vanguard I too would like to swap in a vanguard. Could you update us on the electrical and how it is running?
ReplyDeleteThanks
ohh ok saw new post of finish work. thanks
ReplyDeleteNo worries - I figured the wiring was worth a post in of itself :)
DeleteActually was pretty straightforward once I figured out how the fuel solenoid worked.
If you have any questions - fire away! Considering it was my first engine swap, it was actually pretty easy :)