Recently I got into a bit of a nostalgia kick when I found a box of old 35mm film slides at my parent's house a few weeks ago.
Finding those slides brought back memories of sitting in a dark room, watching pictures of someone's recent trip someplace far away. I can remember the click of the slide projector as it cycled through to the next slide, the smell of the hot bulb in the projector, and of course, watching the odd upside-down slide flash up on the screen.
This was an experience that is now lost to time since we live in a streaming YouTube world.
Millions of these slides now languish on the back of closets, forgotten.
The really nice thing about 35mm slides was that they typically had a high-quality image, almost rivaling the high definition quality of the pictures that we can take on our smartphones today.
There is a lot of history lock up in those slides, the problem is that without a projector of some sort, they remain locked inside their square cardboard sleeve.
I developed a plan to rescue the slides that I had found by converting them into a digital format. You can purchase devices on Amazon that can convert slides for you, but again, my cheapness kicked in when I saw that even an inexpensive converter was around $150.
Recently, I picked at an auction a lot of old slide viewers for a few dollars. The viewers were used to preview slides before you put them into a slide projector's carousel.
Most of the viewers had a small viewing window that had a small lightbulb inside to light up the slide. However, one particular viewer used the light from the room to illuminate the slide, and the slide was viewable as a large image.
As an experiment, I tried to take a photo of a slide as it was seen in the viewer with my smartphone. I was actually quite pleased with the image quality that I got on the phone.
So between this old slide viewer and my smartphone, I had the makings of a converter for my box of slides.
My plan for building a scanning rig is to build a wooden cradle for the slide viewer to sit in.
The smartphone would sit on a little platform in front of the viewer with the phone's camera sitting as snugly as possible to the viewing port.
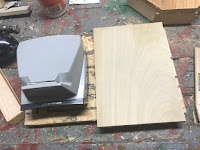
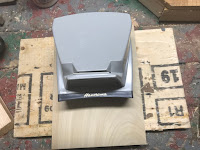
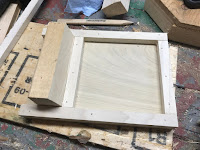
To built the cradle I first took some measurements of the slide viewer and cut out a piece of hardwood that was about an inch wider than the viewer and about 5 inched longer than the viewer.
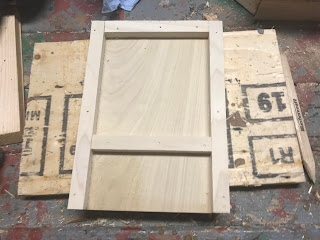
My plan was to install rails around the outside edges of the board in order to create a small surround around the slide viewer. To make the rails I cut a few 1.2-inch square rails out of hardwood and cut them to size so that I had a rail running down the length of both sides of the board along the outside edge and a rail along the back edge of the board.
I attached the rails in place with some glue and brad nails.
Giving the viewer a test fit, I placed the viewer on the board so that is sat between the side rails with the back of the viewer placed against the back rail.
Taking another piece of 1/2 inch rail, I cut it to the same size as the back rail and fitted it relatively snugly to the front of the viewer and I also attached it to the board with glue and brad nails.
The end result was that I now had a little tray for the viewer to sit securely in place.
The next step was to figure out the mounting for the smartphone so that it could be situated to get the best possible picture from the viewer.
Looking at the viewer itself, I noticed that the part that you looked into to see the picture was at a bit of an angle. where the best view of the slide was had by looking through the view at that angle.
To take the best picture with the phone's camera. that meant that the phone had to be mounted so that it was pointed into the viewer at an angle.
To determine the angle that I needed I placed my smartphone flush against the viewer and took a measurement of the angle the phone using an angle finder.
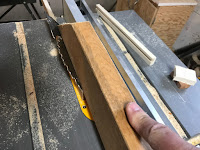
I then used the angle finder to set the angle on my table saw and I then cut that angle into a 2-inch wide piece of wood.
Trimming the wood that I just cut to the width of the viewer tray I then glued it to the tray so that it was flush against the 1/2 inch strip that was in front of the viewer.
This basically completed the construction of the tray.
So a coat of paint was in order.
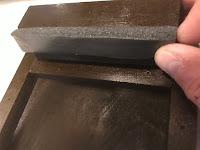
After the paint dried, as a final touch to ensure that the phone fits as snugly as possible, against the viewer, I placed a strip of thick weather-stripping along the top of the angled piece of wood where the back of the phone would rest.
The next step was to try it out.
In the case of my iPhone, the camera is located on the top left side of the phone. To use it with the viewer, I just inserted the phone between the front of the view and the backrest of the tray.
After some adjustments to center the image, I could easily take a picture of the slide with the phone.
I must admit, the end results were pretty good
So I now have a bit of a slog ahead converting a few boxes of slides, but now the images can be enjoyed once more.













No comments:
Post a Comment