Last week I was ripping some stringers from a pallet for a new project that I was working on when my table saw made a bit of a clunk and shot out a couple of sparks - it would appear that I had forgotten to remove a nail from the stringer before I started cutting.
Obviously, the saw blade didn't really like that too much and proceeded to tell me this by making an absolute mess of the cut on the next board that I ripped.
Effectively I wrecked the blade and it needed to be replaced.
Changing a saw blade on a table saw is a fairly straight forward affair of loosening the nut that attached the blade to the spindle of the table saw's motor, except for a slight twist.
If you tried to just take a wrench to the nut, you will quickly find that the blade will just spin freely as you turn the nut. No matter how dull the blade is, it is still not a good idea to have something like that near fingers that are in close proximity, nor can you just hold onto the blade with one hand while wrenching with the other - a sure-fire way to get a nasty cut.
To do it properly, you need to wedge in a piece of scrap wood between the blade and the body of the table saw. The blade digs into the wood, and not your hand as you loosen the nut.
Switching saw blades is just another part of regular shop maintenance, that thing you need to do from time to time to ensure that your fingers stay attached and your projects look decent.
When the new blade was firmly attached to the table saw, I cast my eye around the other bits of equipment that I had sitting around in the shop.
The first thing that I saw was my air compressor.
Next to my table saw, my air compressor is the one tool that I use the most. Not only is it good for blowing off the dust on my workpieces in preparation of applying stain or varnish, but I use my compressor to run my air nailers, which really speeds up the assembly process.
The issue with air compressors is that they can easily be the most overlooked tool in the shop when it comes to basic maintenance.
In a lot of ways, an air compressor is very much like the engine in a car. It contains a crankcase, a piston, cylinder head, and intake and exhaust valves. The only difference here is that instead of compressing and exhausting fuel, it's compressing and exhausting air into a storage tank.
The thing about engines is that they need good lubrication to run right. To keep an engine running for a long time, you need to regularly change the oil. This is true for both your car and your air compressor.
While you can get "oil-less" air compressors, I personally never had too much luck in getting any longevity from them.
In the case of my current air compressor, it is an oil type that keeps a reservoir of oil in an oil pan much like a car engine. While I can't measure my oil change interval in kilometers driven, there is an easy way to know when to change the oil.
Air compressors usually have a little sight glass near the bottom of the compressor, usually where the oil sump sits. That little sight glass is a fountain of information. If the oil is dark, it's time to change it (likewise, if it's clear it's all good). If the oil level is in the center of the sight glass, all is well, no oil in the glass - add some more, if the glass is filled to the top with oil, take some out.
The issue is that a lot of people don't realize that this is a vital maintenance item in the shop until your compressor suddenly seizes at a very inconvenient time.
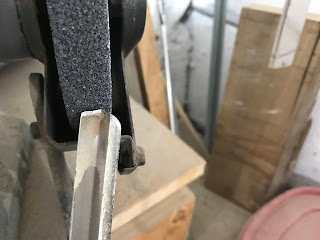
Finally, I took some time to give some of my lathe chisels a bit of a sharpening up.
I know that there is a bit of an art to properly sharpening lathe chisels, especially bowl gouges.
When I took the bowl turning course a little over a year ago, they did give me some instruction on how to properly sharpen the chisel and how it was demonstrated in the class made it seem that it was a pretty easy process.
What I failed to realize at the time, was that they used a specially made jig and a grinding wheel specially made for that sort of thing.
Me, on the other hand, just have a run of the mill bench grinder.
I realize that the end results of my work would likely make any lathe pro cringe.
But hey, the chisel still works well enough for what I need to do, and I am still in the learning curve on this, so I will eventually get better.
After a couple of hours of fixing this and tuning that, everything was in good order and ready for the next project.
For that little bit of effort, I know that my tools will never leave me in the lurch.


No comments:
Post a Comment